This week at the Plaid corporate offices, we once again sponsored our monthly Lunch n Learn event and this month our new FolkArt Stencil Cremes, FolkArt Stencils and some of our Plaid surfaces were featured in the spotlight! Have you ever stenciled using our new FolkArt Stencil Cremes? Let me tell you they are soooo easy to use and the colors blend beautifully to shade and/or highlight giving your finished stenciled design that desired hand-painted effect. Another advantage to working with FolkArt Stencil Cremes is that the clean up is simple; paint residue on the stencil is easily wiped away and brushes can be cleaned with soap and water. Follow along with me and I'll show you the projects I shared with my coworkers this month.
Supplies to gather...
- Wooden Surfaces - assorted small plaques or wood canvas panel
- FolkArt Stencils - 6" x 6" Birds, Dahlia
- FolkArt Acrylics - Vintage White
- FolkArt Stencil Creme - Rainbow
- Stencil Tape
- Stencil Brushes - 1/4", 3/8"
- Miscellaneous: Brush basin or container for water, Paper towels, 3/4" Flat brush, Fine grit sandpaper

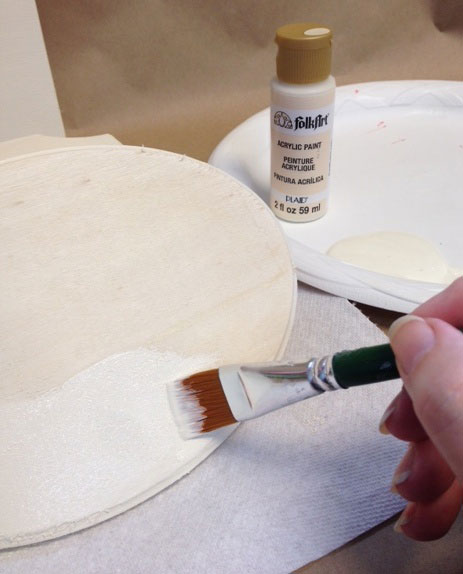
As with any project the surface must be prepared first. All of the assorted surfaces were painted FolkArt Vintage White using a 3/4" Flat brush, however, you can also use a 1" foam applicator. Allow the surface to dry, sand smooth and reapply the base color. Allow to dry again.
NOTE: I love Vintage White, it is creamy has great hide and is the perfect creamy color for any craft project!
Now let me tell you a little about
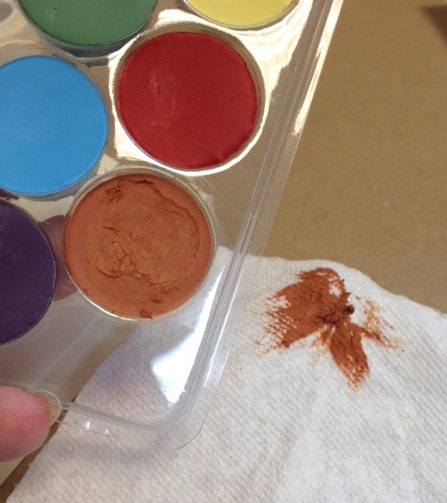
FolkArt Stencil Cremes... there are four color collections: Rainbow, Basic, Old Glory, and Naturals. You can currently find FolkArt Stencil Cremes at Hobby Lobby, Jo-Ann, Walmart and at
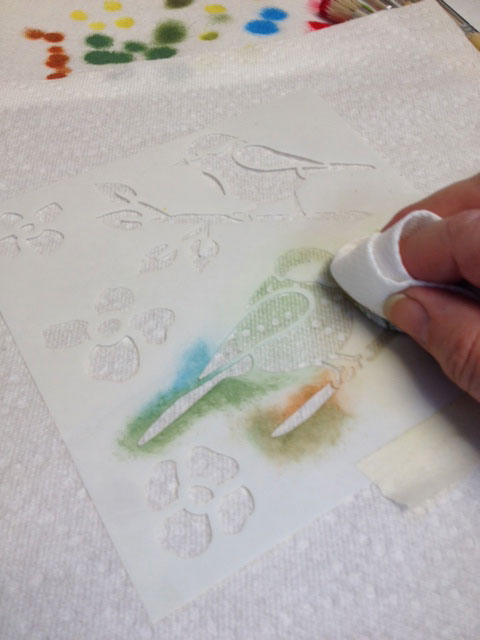
Plaidonline.com. After opening the package, you will notice six (6) little pots of paint. You can tilt the package and the paint will not spill over.... amazing ... that is because this is NOT a liquid stencil paint. FolkArt Stencil Cremes are actually oil-base paint in a wax medium. There is a slight oil paint odor but it is much like the smell of crayons ... and let's face it ... that smell brings back happy memories and makes you feel even more creative when stenciling! They dry with a "wax film" over the surface which needs to be removed prior to loading your brush to stencil. You may wipe over the paint surface with a paper towel wrapped finger as I did below or you can use the handle end of your brush to break the wax seal.
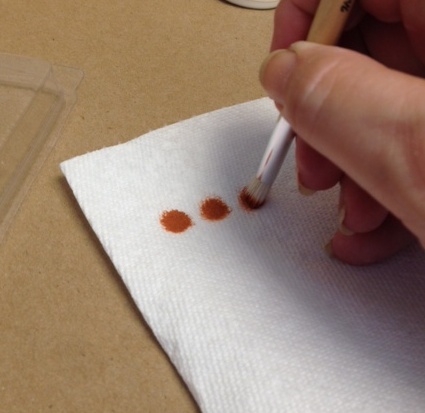
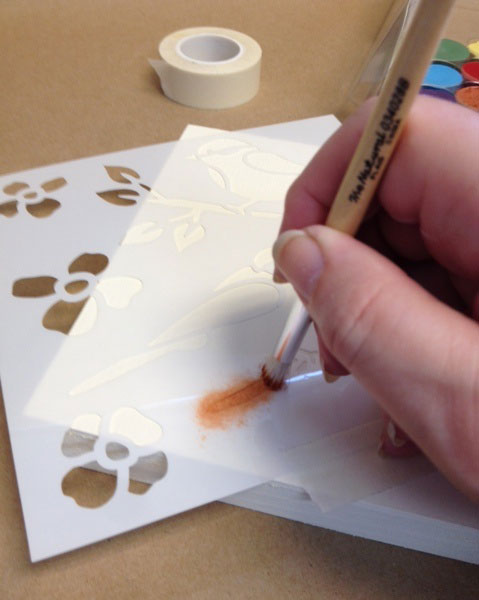
Once you have broken the wax seal and exposed the paint, load your brush by touching the surface keeping the brush straight upright with the bristles flat and move in a circular motion.

Always "off load" the excess paint prior to stenciling. As shown in the photo below, touch the paper towel surface straight up and down, apply slight pressure and repeat the circular motion.
NOTE: Think of standing in place and moving your hips to keep a hula hoop in place! Continue a couple times to achieve an almost "dry" brush.
Position your
FolkArt Painting Stencil - Birds where desired on the prepared surface. Stencil tape can be used to hold the stencil in place. You can also use stencil tape to mask over any open areas that are close that will be a different color. Begin stenciling holding the brush vertically using light pressure and move the brush in a clockwise - counter clockwise motion while moving the brush throughout the stencil.
NOTE: You can see below I began stenciling the tree branch.
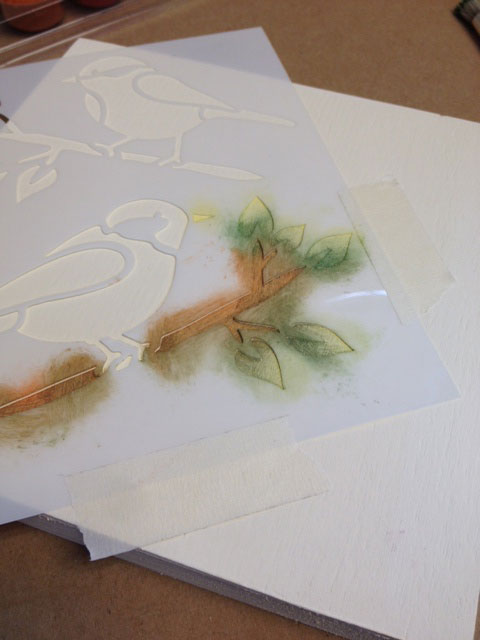
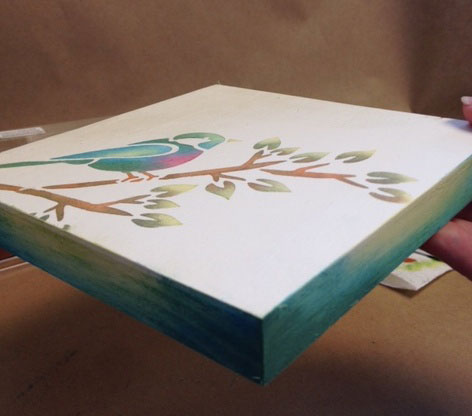
Once you try stenciling with FolkArt Stencil Cremes, you will soon learn that they are fabulous when you want to layer colors to shade or highlight. See below as my project advanced ... I used a little green over the tree branch and check out the leaves ... you can see yellow tips, green leaf body and a touch of the tree branch color at the base!
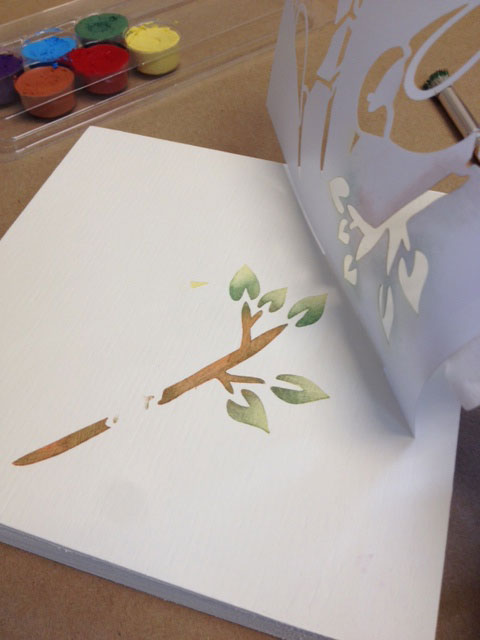
Voila! Check this out ... and it was so easy.
NOTE: I do recommend having a different brush for each color so your brush will not get "muddied" with color combinations.
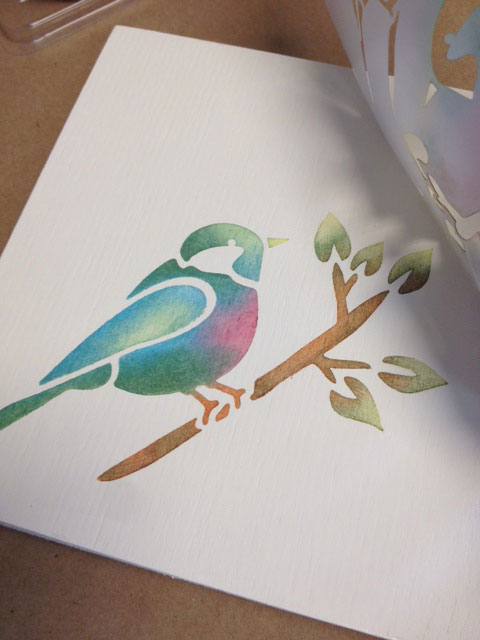
So now let's try the bird ... I stenciled using blue, yellow, green and a touch of red for a blush on the bird's breast!

What do you think? Pretty amazing isn't it? I tell you, the colors blend so beautifully and quickly without a mess or any stress! I LOVE my blended stenciled bird, don't you?
Remember I mentioned clean up was easy when stenciling with FolkArt Stencil Cremes? Look at this pic below where I am cleaning the paint residue from the dirty stencil. Simply lay the dirty stencil over a paper towel and wipe to remove the excess paint.
The raw wood edges of the 6" x 6" wood canvas panel were also colored using yellow blue and green applied using the same stencil brushes.
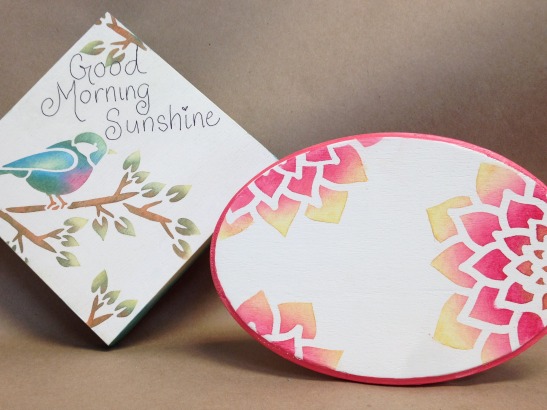
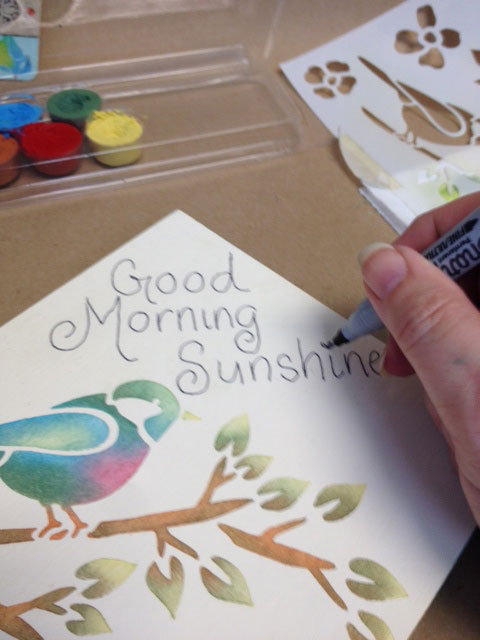
I wanted to write a message on my project. I hear birds chirping every morning and what better message than "Good Morning Sunshine?"
NOTE: A decorative message can be applied using small alphabet stencils, or painting FolkArt Acrylics using a liner brush, or easy peasy using a permanent ink marker like I did. I then stenciled additional leaves and branch slightly over the writing.
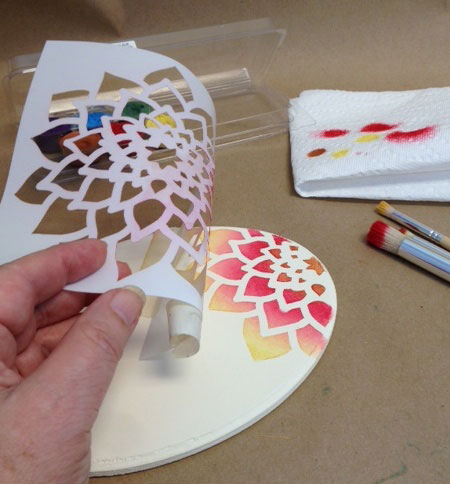
A second stencil choice for our Lunch n Learn participants was the
new Dahlia stencil! Don't you just love it? Here I wanted to show you a couple examples of different colorways using the same color palette. Because of how nicely these stencil paints blend, the sky is the limit! Left to Right ..
Left: Yellow, Red and Terra Cotta ....
Middle: Yellow Green, Blue and Purple ... and
Right: only Red! NOTE: You can shade and highlight using only one color as shown on the right below. Perfect for a monotone project!

For my sample project, I choose the first colorway: Yellow, Red and Terra Cotta. I also designed my project using only portions of the Dahlia stencil allowing the design to "flow" off the surface edge. I then used FolkArt Pink Melon to paint the routed edge of my mini oval plaque. That "pop" of color was perfect!
So here you have it ... Plaid surfaces, FolkArt 6" x 6" Laser Cut Painting Stencils, FolkArt Stencil Creme Rainbow paint set and a couple stencil brushes!

Well, I can tell you that once again my coworkers enjoyed sharing a meal together and learning about our broad-based product lines. Our monthly Lunch n Learn events are always well attended! I enjoyed sharing these stenciling techniques with my coworkers and now with you; I hope you enjoyed this blog post!