I am smitten ... Yes like many people, I am smitten with Polka Dots! It is not hard to believe how popular polka dots are ... just look around! Everything from our clothing, shoes, and purses, to our home décor items, like fabrics, furniture and even wall treatments can be found splattered with fun-loving polka dots! Polka Dots are a favorite staple to many beginner crafters wanting to learn how to paint that perfect polka dot. Believe it or not I am often asked how to paint a polka dot and exactly where should it be placed on their project. Let's explore a few options of both how to paint that perfect polka dot, how to "dress it up" and what are the best tools to use .....
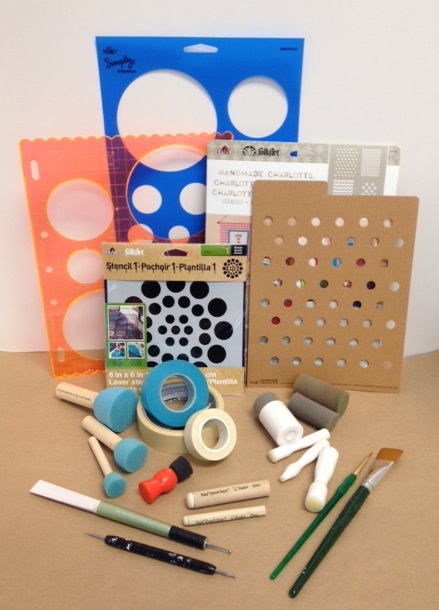
I gathered a few supplies here to share polka dotting fun. Check out the stencils and template all containing circles; but also look at the variety of tools: paint brushes, daubers, pouncers, spouncers, stylus, even rolls of tape!
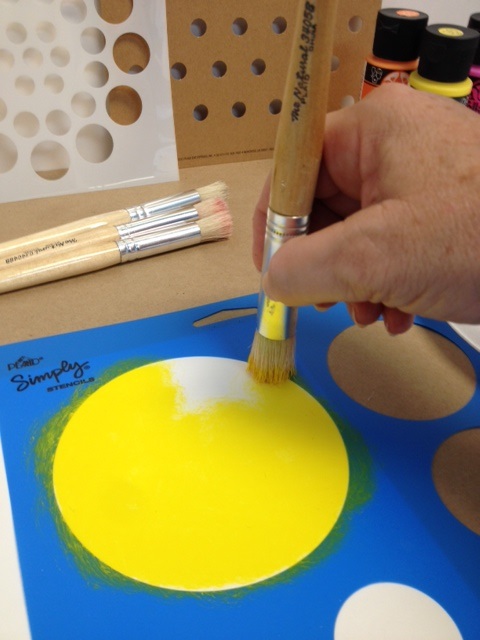
Let's first explore the stencils. A perfectly painted polka dot can begin with the use of a stencil, paint and a stencil brush like you see here. Throughout this polka dot painting exercise, I'll use the same three colors: FolkArt Multi-Surface Bright Pink, Vivid Orange and Daffodil Yellow. Everyday stenciling techniques of using either a circular clockwise and counter clockwise motion OR a stippling/dabbing up and down motion work well.
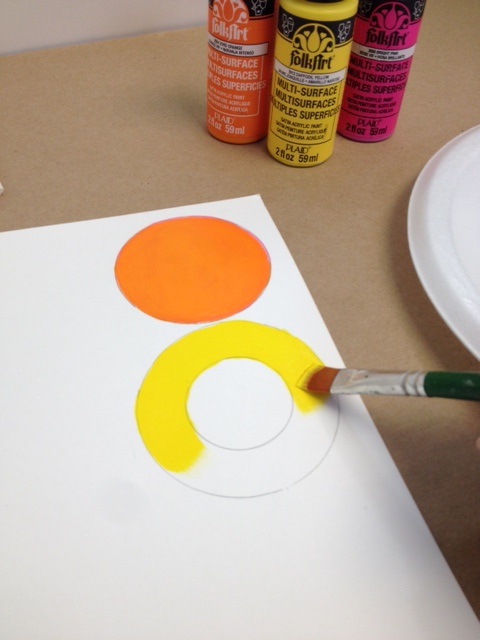
Continue stenciling a variety of circles overlapping or layering each one a different color! This FolkArt Stencil1 stencil is a pattern circle of rings of circles or polka dots! It is fun to stencil with one color or all three creating an ombre effect.
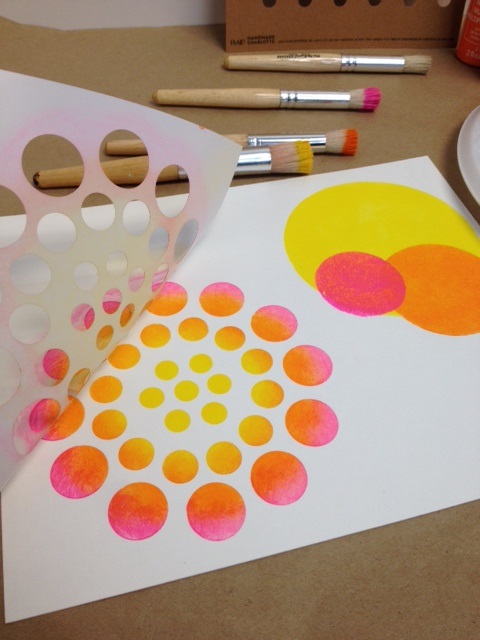
And check out this mini polka dot stencil from the FolkArt Handmade Charlotte Patterns stencil. This would be a PERFECT overall polka dot background for any canvas project! You can use the entire stencil or perhaps only a portion.
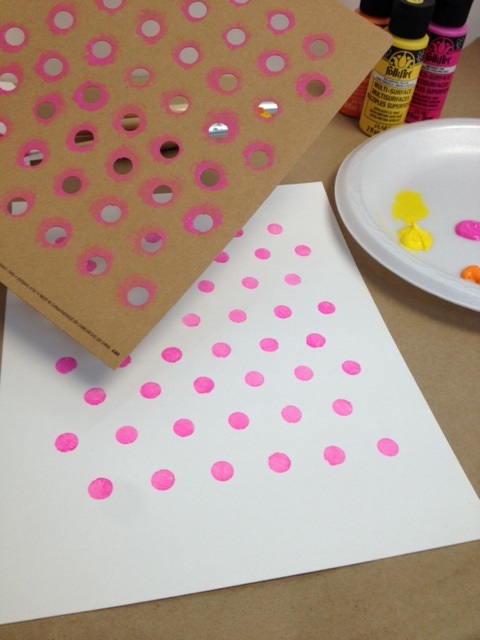
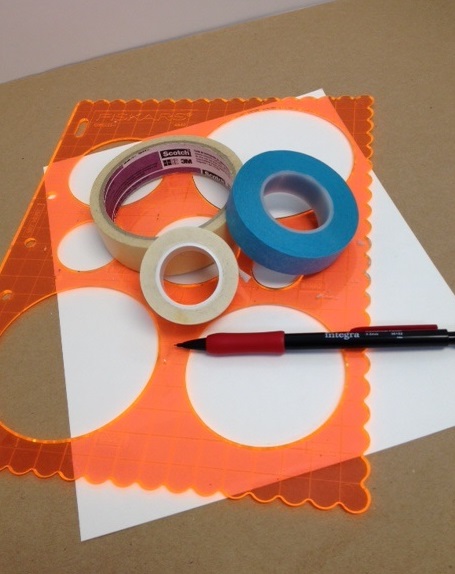
This grouping of supplies, a Fiskars circle template, rolls of tape, and a pencil can all be used to create polka dots too! Simply position the circle template where desired and using a pencil lightly trace inside the template. Don't have a circle template? You can borrow from your kitchen and use a drinking glass, a jar lid, a plate or bowl, even a can of green beans! Not in your kitchen, take a look around your studio, you can find other circular elements, a lamp base, a paint bottle, a terra cotta pot ... circle templates are all around us!
Using a roll of tape is not only fun, but you can create two polka dots in one by tracing the outer edge as well as the interior ring of the tape.

Once happy with traced circular patterns, begin painting the polka dots in desired colors. Easy as that!
And now the polka dot fun continues ... let's explore other tools that can be used to create polka dots! Here is an example of a spouncer that has been loaded with paint. When touching the surface, keep the flat bottom edge FLAT and slightly twist to the right and left then carefully lift straight up so the wet polka dot is not smeared. Spouncers come in a variety of sizes and as you see each size can be painted a different color and overlapped to create a layered polka dot design!
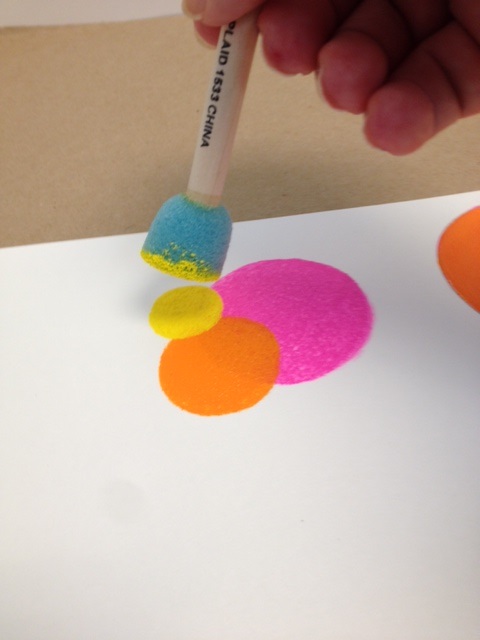
Similar to a spouncer, another foam tool is a Martha Stewart Crafts Pouncer. They too, come in a variety of sizes and are made of a nice dense foam perfect for painting polka dots. Again polka dots can be painted as a single dot or multiple dots layering over the previously painted one.
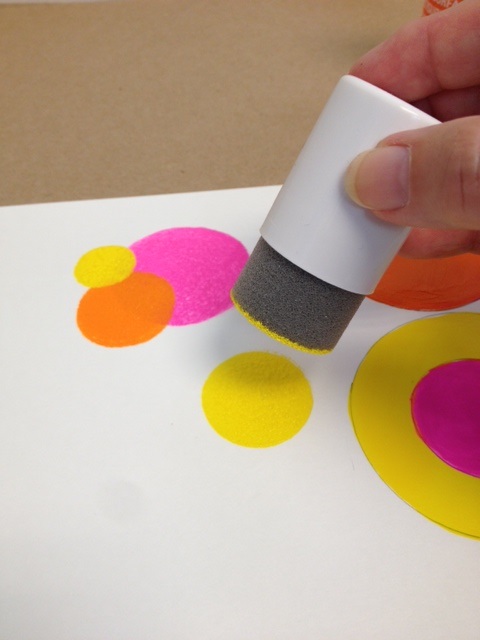
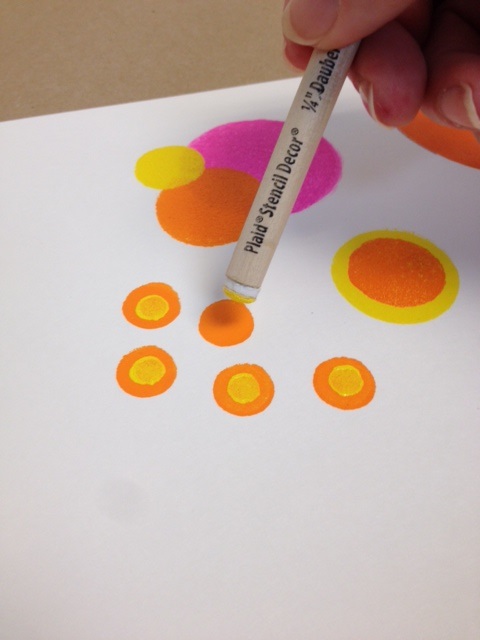
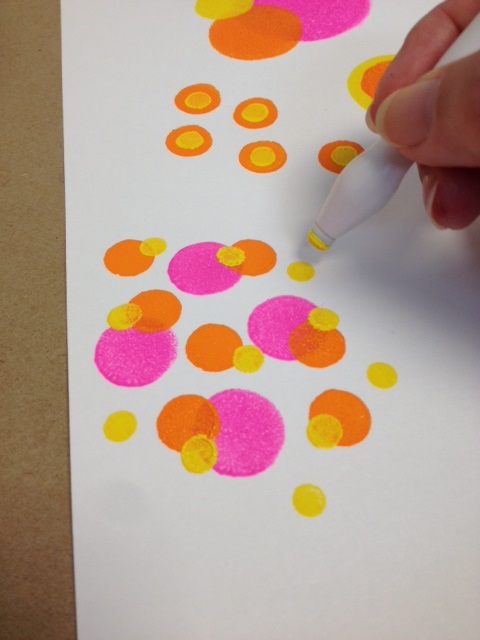
Another tool that is fabulous for painting polka dots is a dauber which often is used for stenciling. They work beautifully when stencil on glassware using a FolkArt Peel & Stick stencil! However, in today's post, I LOVE them for polka dot creations! Daubers come in two different sizes 5/8" and 1/4" and as mentioned above, can be used to paint single or multiple polka dots. Look how I layered the 1/4" over the 5/8" dauber... Have fun creating your own patterns!
Martha Stewart Crafts daubers are also fun and come in three different sizes as shown below.
When painting polka dots, let's not forget our trusty paintbrushes! Simply look to the handle end when wanting to paint a pattern of smaller polka dots. Each sized brush has a different sized handle and therefore will create a different sized polka dot. Experiment and see the brush handle you like for the best sized dot! Equal size dots can be painted evenly by reloading the brush handle for each painted polka dot. However, have fun with descending sized dots too ... keep dotting with one paint load and watch the dots grow smaller with each painted polka dot!
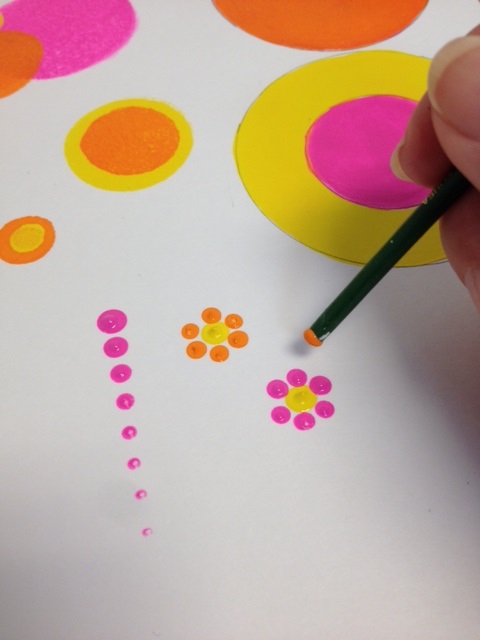
An artist's stylus as well as an embossing tool are AWESOME polka dot painting tools! Here I am using an embossing tool.

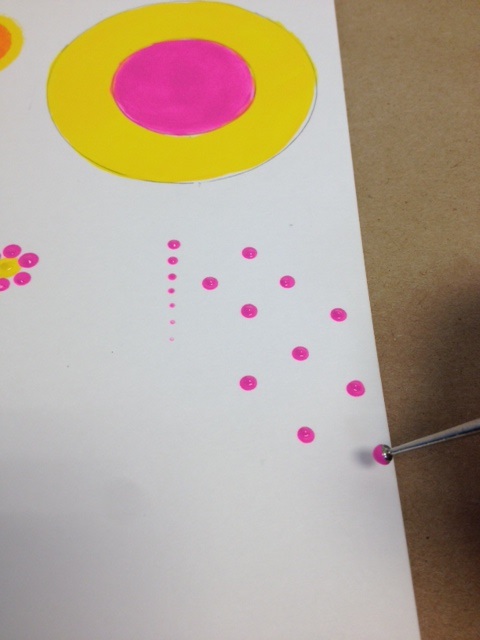
Creating an even pattern of polka dots is so easy. Think of a diamond shape and begin painting a polka dot at the top (12 o'clock) add a dot at 6 o'clock and two more .. one at 3 and 9 o'clock. Then continue building a second diamond off from the first as show below. Remember if you want each polka dot to be equal in size, reload your dotting tool for each painted polka dot.
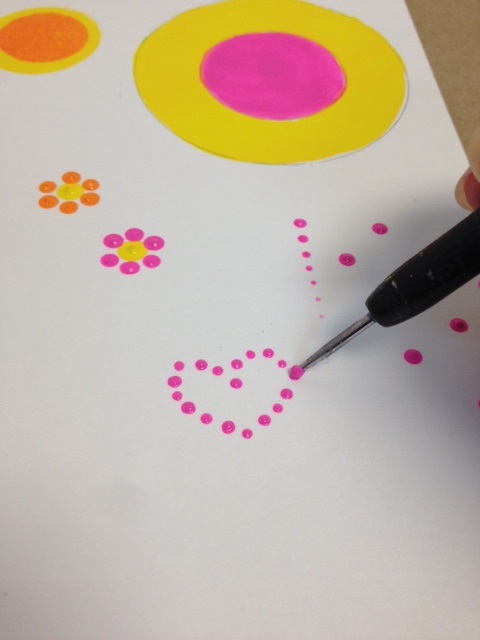
And here is an artist's stylus being used as a polka dot painting tool. Some stylus are double ended with each end a slightly different size ... BONUS ... two different sized polka dots! Have fun making shapes with your polka dots too!
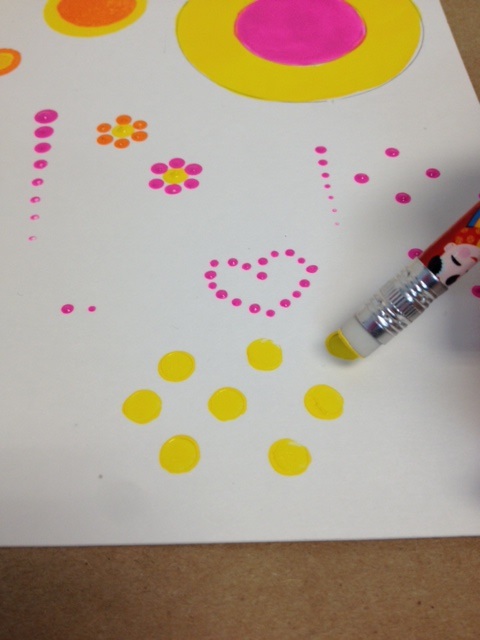
This polka dotting tool is perfect for the kids. Use the eraser end of a pencil, a new one is perfect as it is smooth and flat and creates the BEST polka dots.
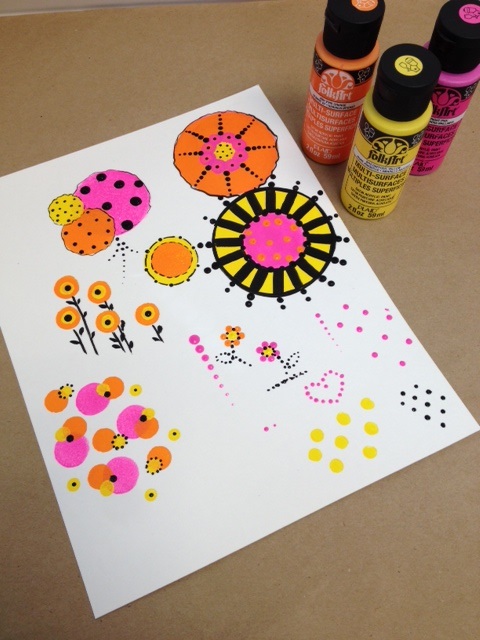
Of course, there are so many more ways and a variety of other tools that can be used to paint polka dots, however, this definitely helps the beginner wanting to learn how to master the painted polka dot. But let's not stop there ... learn to have fun with your painted polka dots; add embellishments! By adding a fourth color, Licorice as an accent and using a couple paint brushes, your painted polka dots can come to life! Check it out!! Do you recognize each tool that was used to create the base polka dot? What do you think?
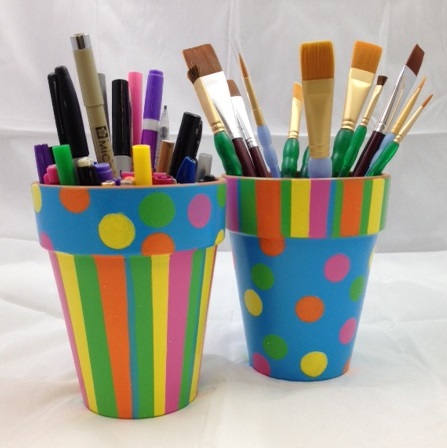
As an added inspiration bonus, here is a set of terra cotta pots I had painted last year and use on my studio table ... one for brushes and one for pens/markers! See how combining painted stripes and polka dots in complementary colors work so well together? These pots would be amazing outdoors with potted flowers on my deck too, painted with FolkArt Outdoor or FolkArt Multi-Surface Paints! I hope you enjoy learning how to paint a professional looking polka dot! I'd love to see your projects!