Can you believe that summer has passed, the kids are back in school and it is almost Halloween? Time has flown by this year! Decorating for and celebrating Halloween is a HUGE event for many people. Did you know that Halloween is now ranked as the second highest holiday that people shop and decorate their homes for? Well, it is, and today I have an inexpensive Halloween project created using Mod Podge Sheer Colors and FolkArt Multi-Surface Paints! Check it out ...
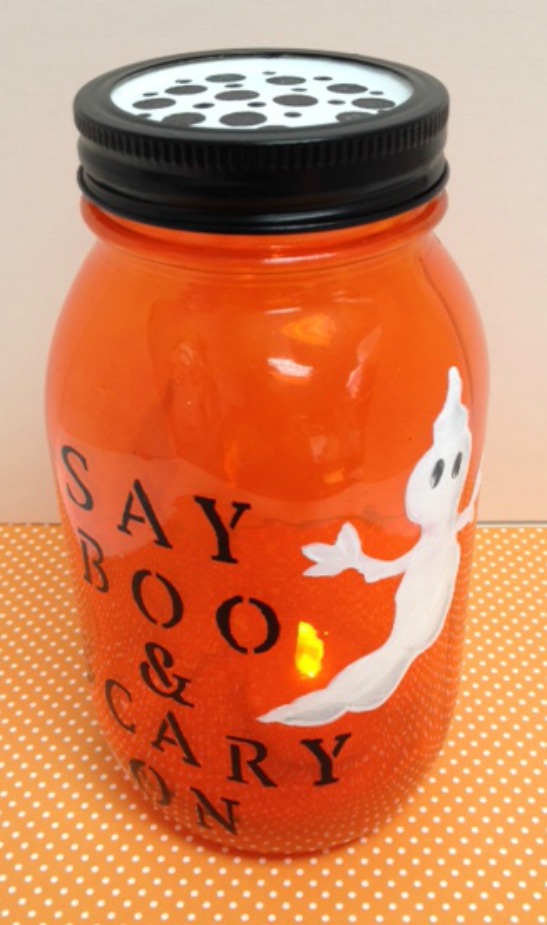
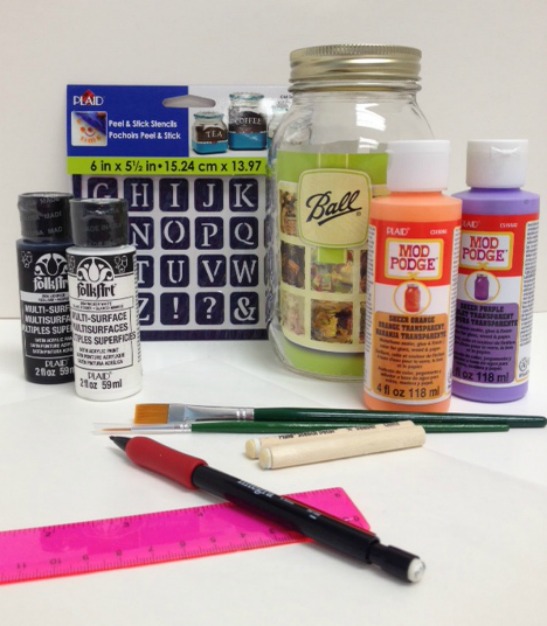
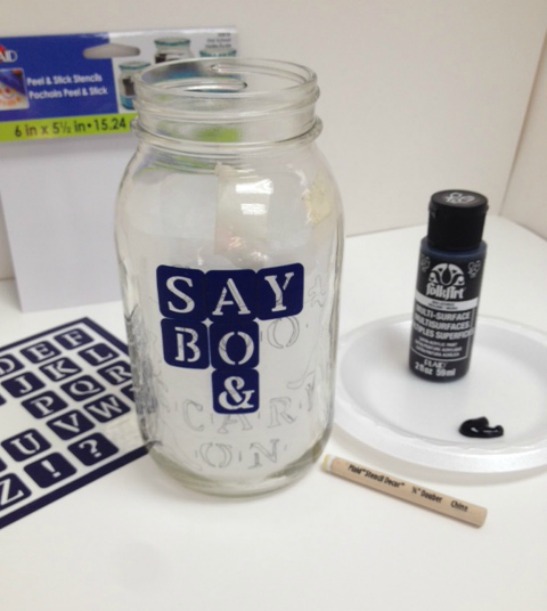
Isn't this cute? It is a simple and fun project which is easy to execute and will brighten up any tabletop Halloween display using a battery operated tealight! Let's gather our supplies ....
The first thing I did was to remove the paper label inside the Ball jar and thoroughly wash the jar in warm soapy water. Dry well and set aside. When working with type or spacing stenciled letters, I often will create a pattern using tracing paper and pencil. TIP: Creating a tracing or tissue paper pattern is a perfect guide to ensure your design and type spacing is to your liking. To create the pattern, I laid a sheet of tracing paper down, I then placed the paper label over it; using a pencil I traced around the paper label, then cut it out.
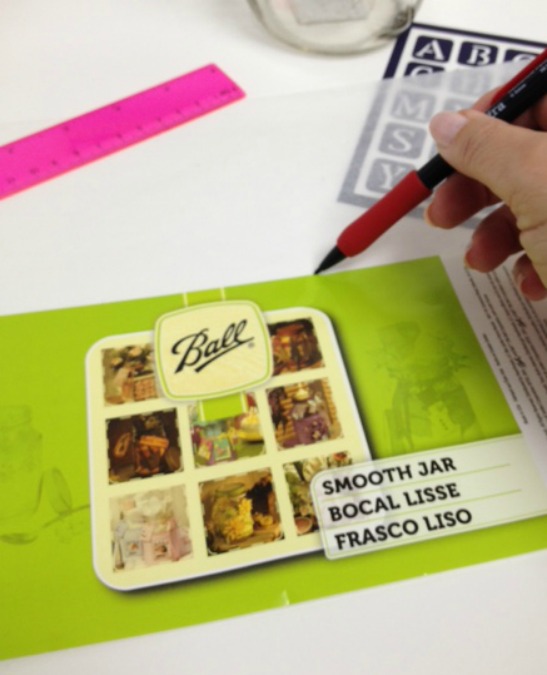
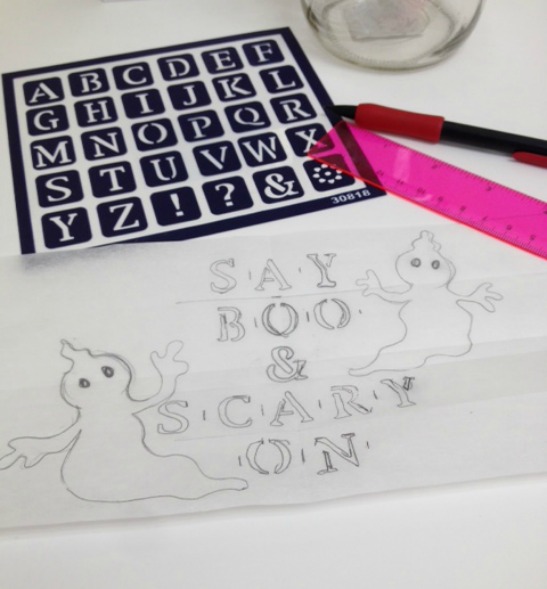
I then marked the center and drew a couple horizontal guide lines. After deciding what my saying was, "SAY BOO & SCARY ON" I then traced each letter to create the paper pattern. TIP: To center each word on the center of the paper template, always begin with the center letter of each word adding the remaining letters to the right and left. After I was happy with the lettering, I quickly sketched a couple wispy ghosts on either side of "SAY BOO & SCARY ON.
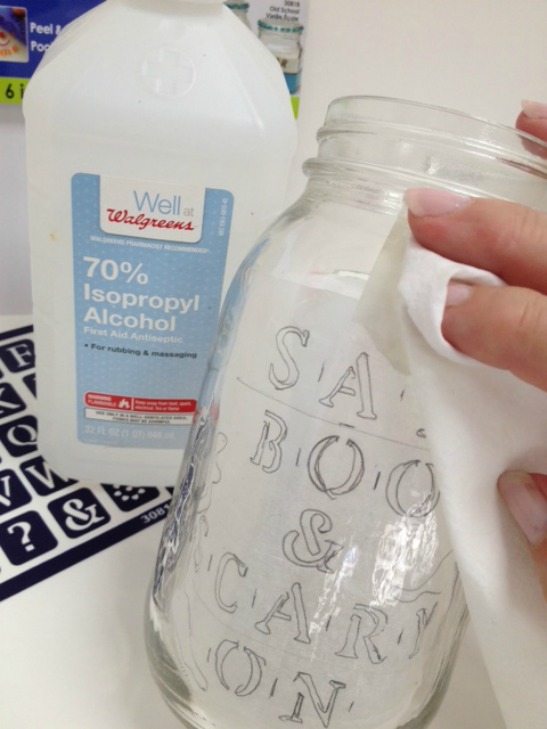
Next roll the pattern template and place inside the glass Ball jar. I used a couple sections of stencil tape to hold the pattern in place. The exterior of the glass jar should be ultra clean to ensure proper paint adhesion, so I then wiped the glass with a rubbing alcohol moistened paper towel.
And now .... let the crafting begin!! Position the Peel & Stick alphabet stencils on the glass jar using the paper pattern as a placement guide, pressing firmly in place. Obviously for the letters used multiple times, "S," "O," and "A," you can only stencil one letter at a time. The stencil should be cleaned and repositioned for the next use.
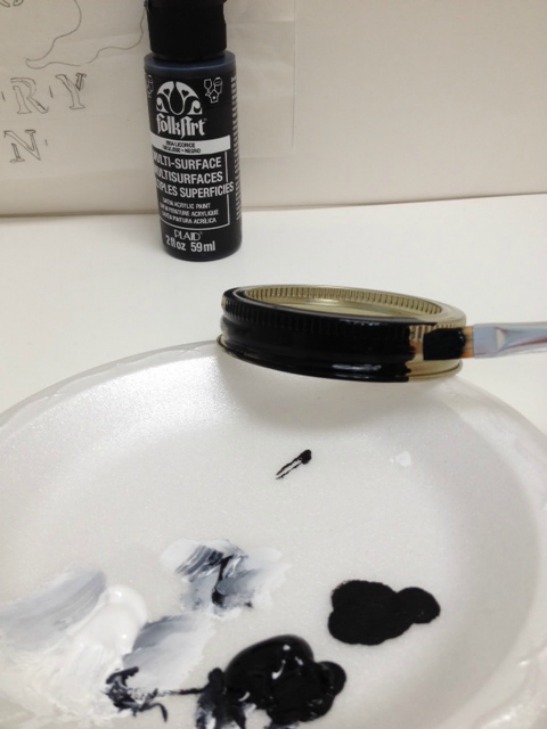
Squeeze a small puddle of Licorice FolkArt Multi-Surface Paint onto a foam plate. Load a small dauber by dipping into the puddle of paint. Off-load excess paint by tapping onto the side of the paint puddle. Continue tapping or dabbing the dauber up and down onto the stencil, applying paint through the opening of the stencil.
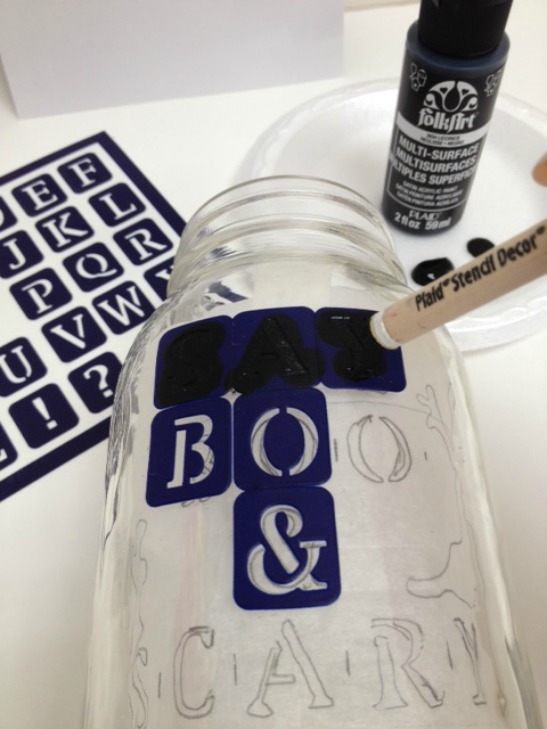
After stenciling and while the paint is still wet on the surface, carefully lift to remove the Peel & Stick stencil. I keep a water basin close at hand and immediately toss the used stencil into the water to be cleaned when my stenciling is completed.
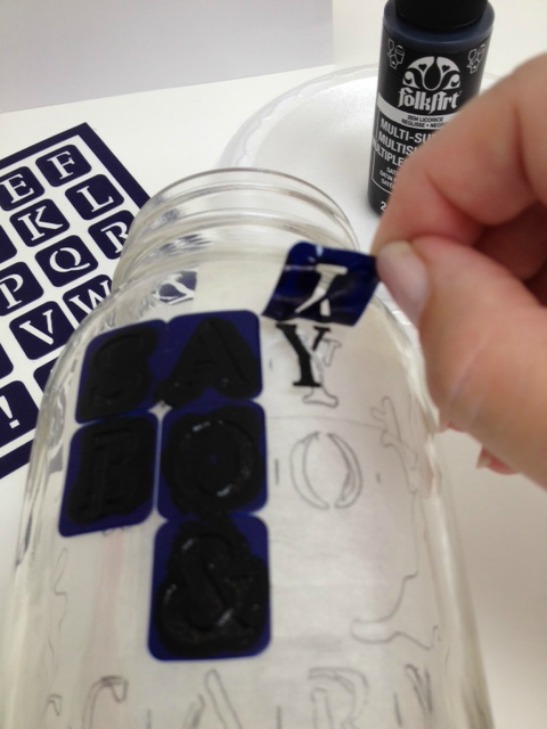
Next after cleaning the letters being reused, I repositioned the remaining letters and words; then repeated the stenciling process.
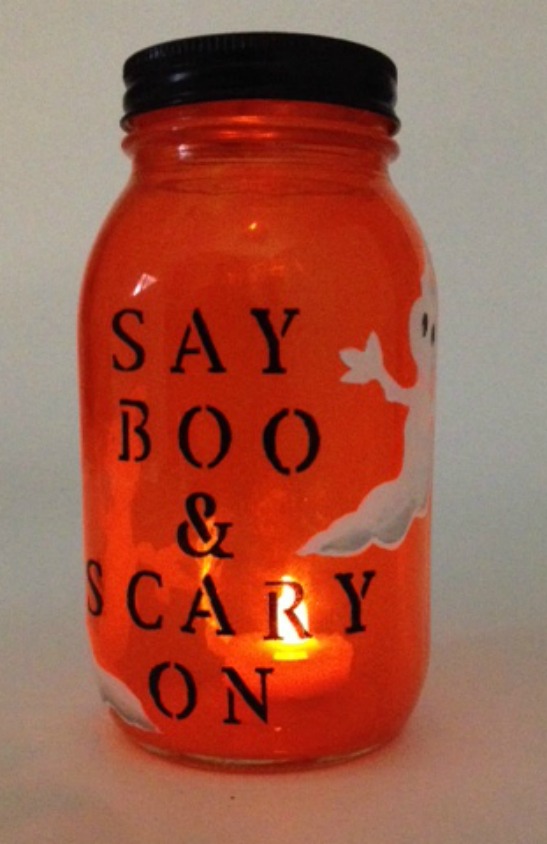
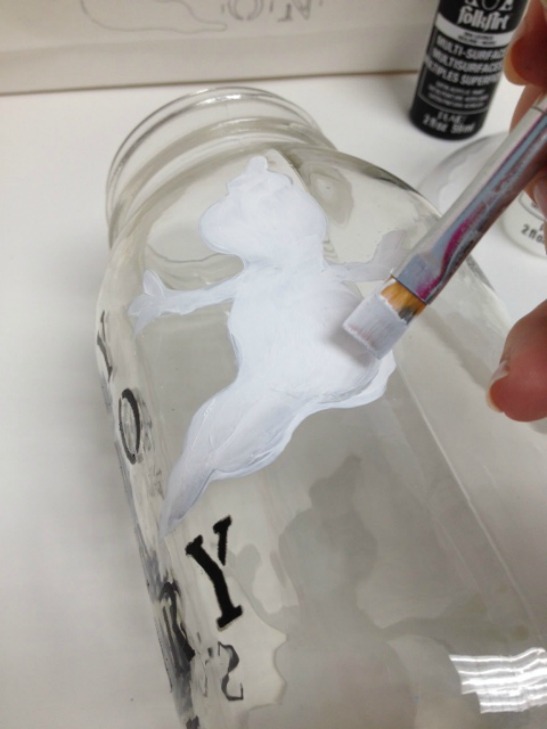
My wispy ghosts were next. I loaded a small flat brush with Wicker White FolkArt Multi-Surface Paint and began painting the wispy ghost shape, painting both ghosts. Having the pencil pattern taped inside the Ball jar, helped me see where and how large to paint my ghosts. I wanted my ghosts to be opaque, so I waited a few moments for the paint to dry and then reapplied a second coat of Wicker White.
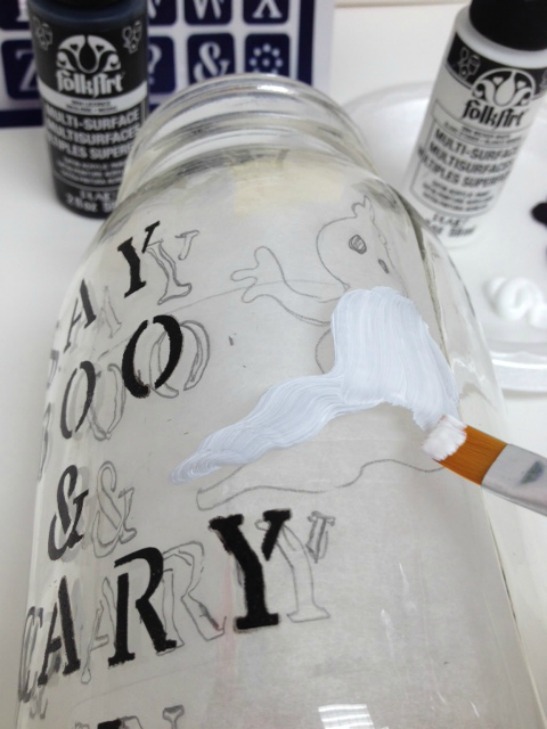
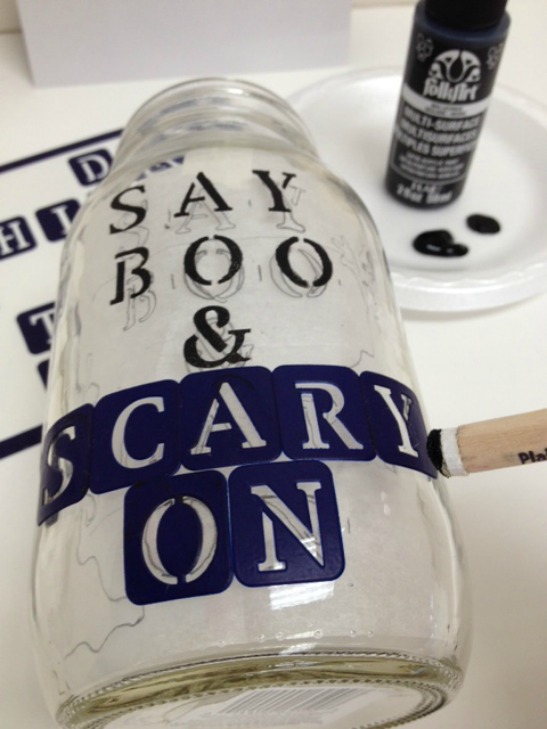
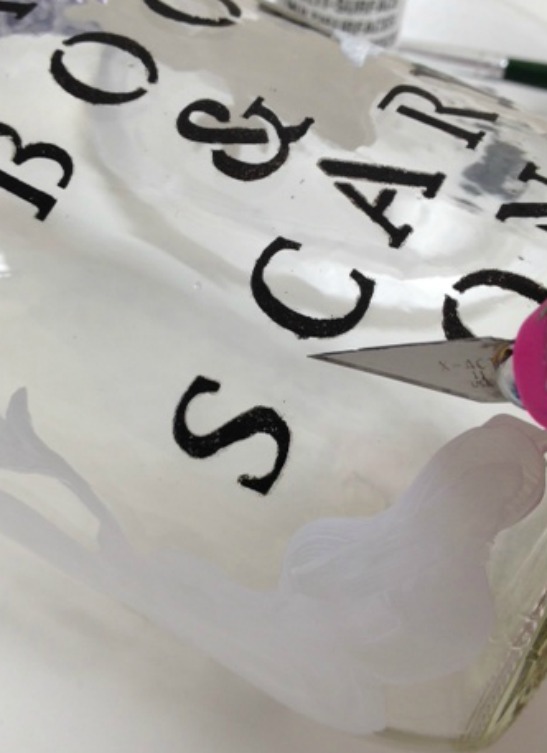
While I was waiting for the Wicker White to dry between paint applications, I studied my stenciled letters which were dry and noticed that I had a little "opps paint blob" next to the "C" good thing that happened so I can share with you how to fix it .... simply scrape along the excess paint using the tip of a sharp craft knife. The paint blob can be easily removed and no one will ever know .... ta da!
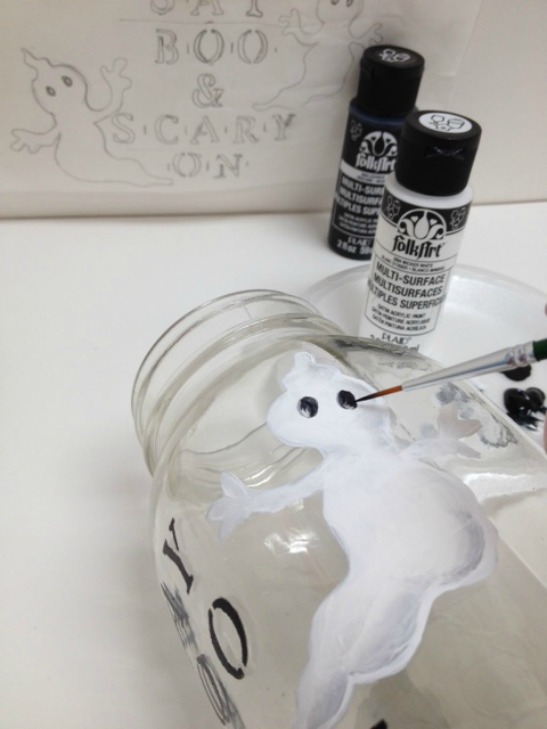
My ghosts needed just a touch of shading along the side and at the bottom. (This step is definitely optional, your ghosts can be left just white!) To create the light application of shading, load your small flat brush with Wicker White; add a tiny touch of Licorice on one edge and then blend on the foam plate to soften that black to a light gray. Paint along the side and bottom of each ghost as shown in the photo.
I then painted two oval eyes using a No. 1 Liner brush loaded with Licorice.
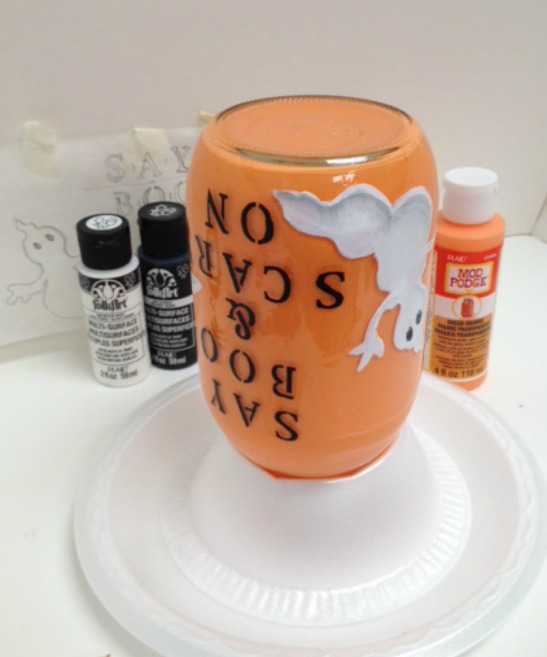
Of course the next step is optional, but I just could not leave the "brassy" color of the Ball jar lid and insert. So I painted the insert Wicker White and the ring Licorice. Allow each to dry and then decorate the insert with polka dots, stripes, or even a stenciled monogram!
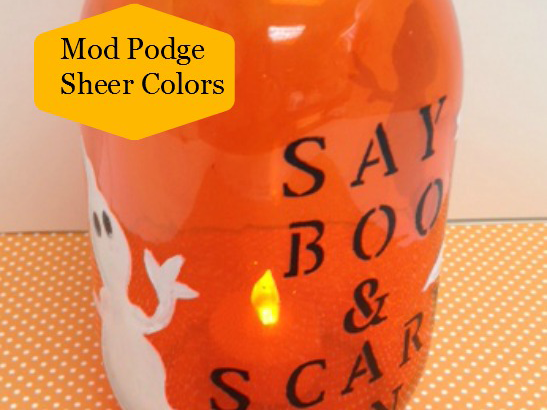
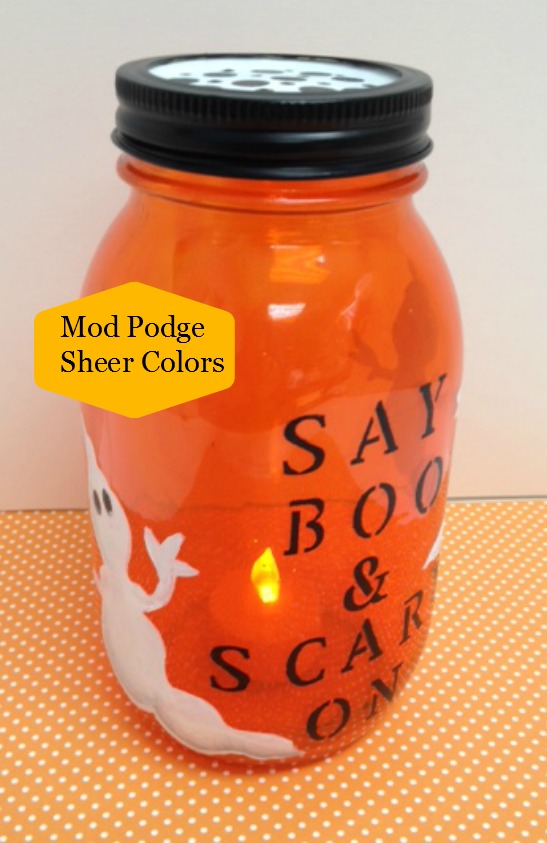
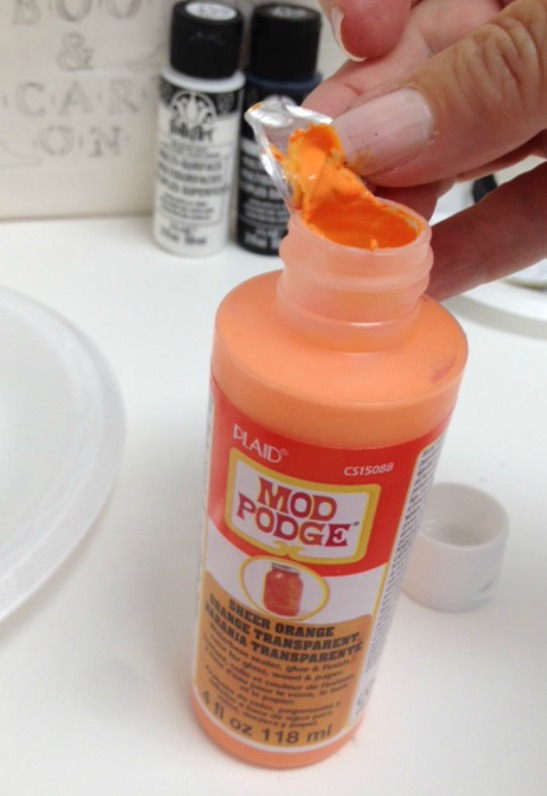
The next step is where Mod Podge Sheer Colors comes in .... I choose Sheer Orange, however, I totally think the Sheer Purple would be cool too. Unscrew the lid, remove it and then peel the heat seal as shown in the photo. Replace the lid and screw back in place.
I then flipped open the lid and began squeezing a small amount of Mod Podge Sheer Color inside the Ball jar along the inside edge. Apply enough Sheer Color so that it will drip down the interior jar walls.
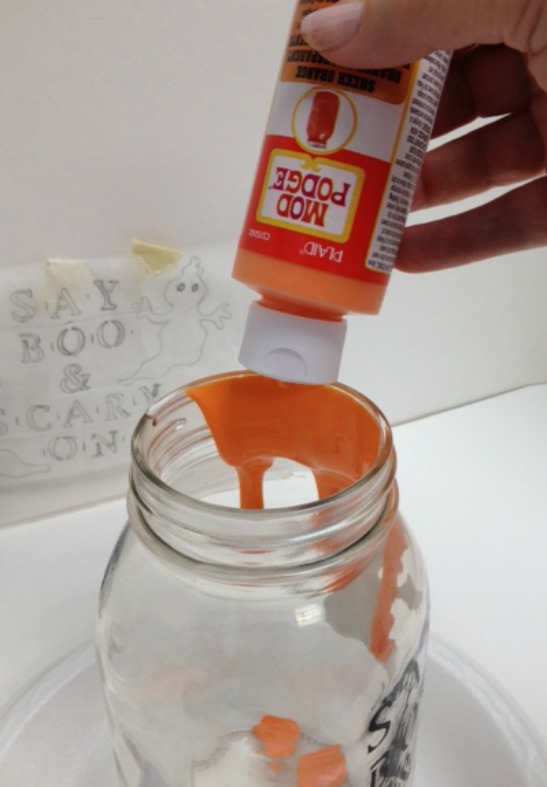
TIP: Be careful not to squeeze an over abundance of paint into the jar. Once the jar mouth is covered with Mod Podge Sheer Orange, stop squeezing and begin shaking the jar allowing the Sheer Color to move around inside the jar. Continue rotating and shaking the jar until the entire Ball jar interior is covered with Sheer Orange. When you apply the color, it will appear milky orange almost like a frozen dreamcicle treat while wet.
The next step is to remove any excess Sheer Color from inside the Ball jar. I like to hold the jar upside down over a trash can and vigorously shake it. It is amazing how much excess you can shake out! I then like to keep the jar upside down to continue the excess dripping.... so I cut the bottom of a foam bowl creating pie wedges.
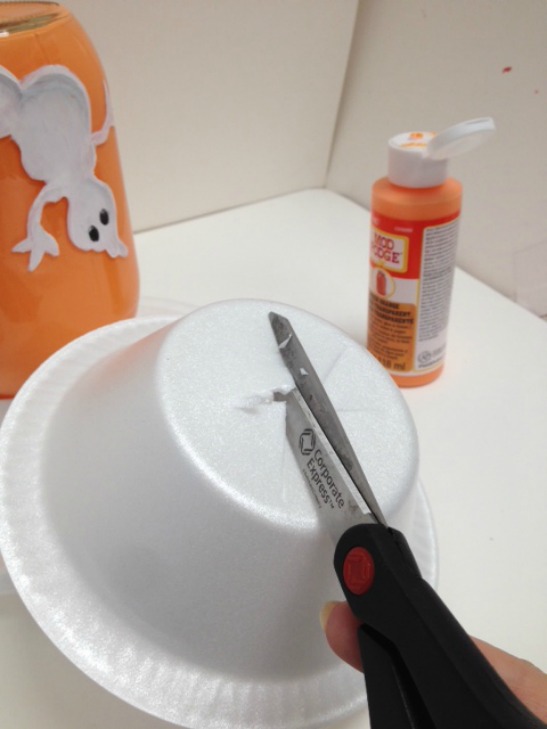
The mouth of the Ball jar will slip through the cut wedges and keep the jar from touching the surface. I then placed the inverted bowl and jar over a foam plate to catch the excess drips.


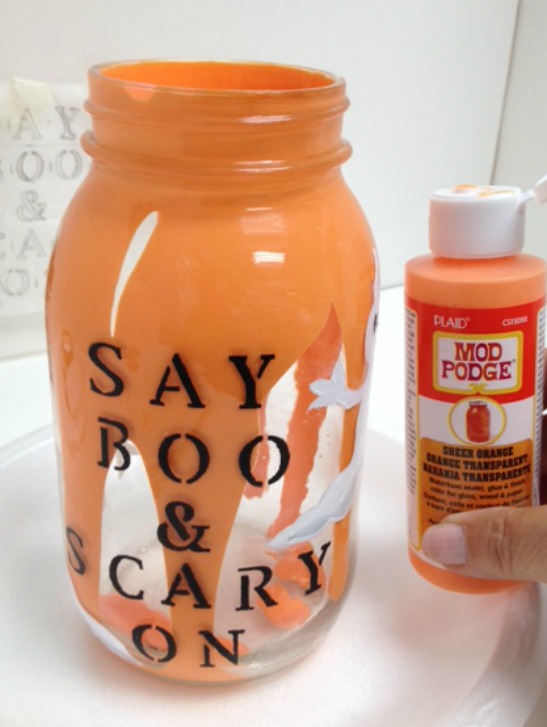
I kept the jar inverted for approximately one hour. Next, I removed the jar from the drip plate and foam bowl riser to allow air flow into the jar and begin the drying process. This may take a day or two depending on the humidity, air flow, and how wide the jar mouth is. Even though it may take a day or two, it is fun to watch the drying process. The jar dries to transparent color, so in the process ... some wet areas will still appear milky orange and the dry areas will appear bright transparent orange; it is fun to watch the transition!
Wasn't this a fun project? In this last photo, you can see I added Licorice polka dots to the lid... how fun! TIP: Because the Mod Podge Sheer Color is on the inside of the Ball jar and is not intended to be waterproof, you will not be able to use it as a fresh flower vase, however, silk mums would be awesome! And if using your Sheer Color jar for a luminary, you must only use battery operated tealights; do NOT use a real votive candle. Now have fun and create several luminary jars to light your festive Halloween display!