Mod Podge and teachers go together like peanut butter and jelly… they’re both versatile, resourceful and the best at multi-tasking! Our team has come up with 7 Creative Classroom Teacher Hacks using Mod Podge with tips on everything from a cool lamination alternative (skip the costly lamination sheets!) and how to tint Mod Podge for unlimited color options. Even if you’re not a teacher, try incorporating these ideas for maximum Mod Podge fun.
And a part of our 50th Anniversary Celebration, our Mod Podge hub also offers resources for teachers like free lesson plans, a free downloadable 2017 calendar, printable papers and more: www.plaidonline.com/modpodge50
PLUS: Exclusively for our followers, we’re offering our Mod Podge Teacher Try Me Kit at an incredible 40% off through 3/31/17.
7 Creative Classroom Teacher Hacks Using Mod Podge
HACK #1: Makerspace Organization made Simple
Ever create a beautiful makerspace, but your students can never keep it organized? I have a teacher hack that you just have to try! Learn how to organize your Mod Podge makerspace supplies; which will allow your students to keep supplies organized independently.
Step 1: Collect all the supplies a student would need for a Mod Podge project.
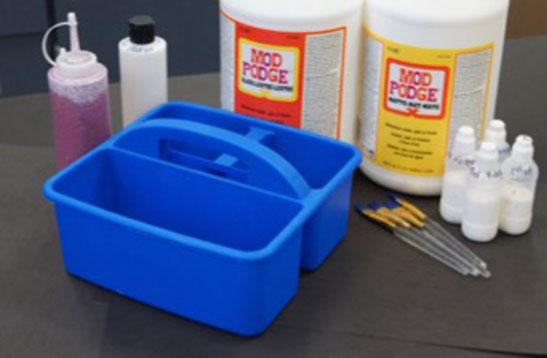
Step 2: Find a Caddy (one with open storage and a handle works best) that allows for all supplies to have a specific home.
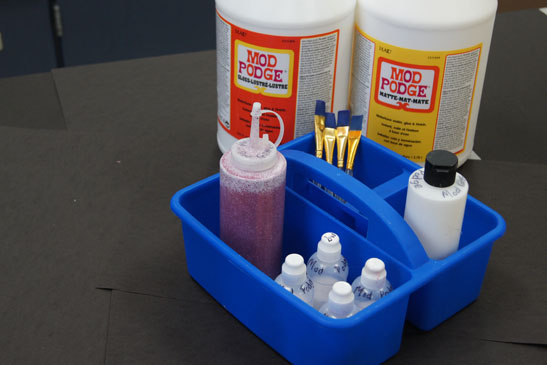
Step 3: Take a picture of caddy with all supplies neatly stored and attach the photo to the outside of the container. Students will easily see how to return supplies after each use. Enjoy embracing the creativity without the mess!
HACK #2: Self-Cleaning Makerspaces: Keep Students Learning Without the Mess
Wondering how to keep your makerspace clean? This teacher hack that you just have to try that will allow your students to clean their Mod Podge makerspace independently.
Step 1: Collect all the cleaning supplies a student would need to clean a Mod Podge makerspace.
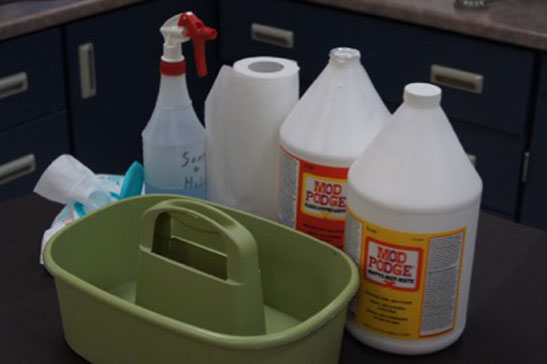
Step 2: Find a Caddy (one with open storage and a handle works best) that allows for all supplies to have a specific home.
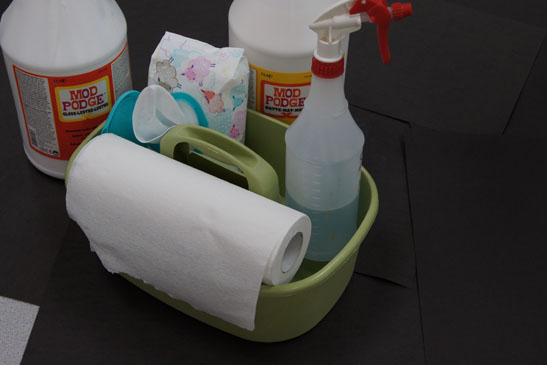
Step 3: Take a picture of caddy with all supplies neatly stored and attach to the outside of the container. Students will easily see where to return cleaning supplies after each use. Enjoy embracing the creativity without the mess!
HACK #3: Teachers, Fear the Glue Bottle No More with a Practical How to Alternative
Admit it, you hate glue bottles! Teachers have tried every saying, song, and dance but glue bottles are just too complicated for young students to use correctly. This teacher hack that you just have to try using Mod Podge, in the classroom, rather than student glue or glue sticks.
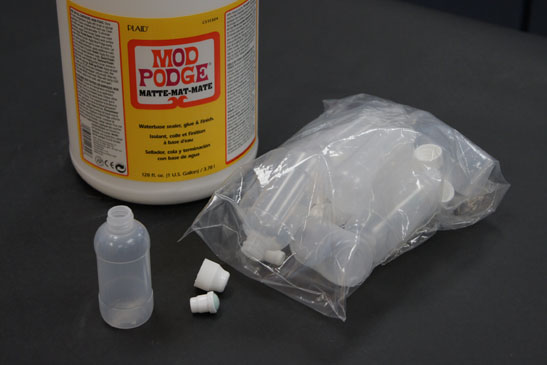
Step 1: Order a gallon of Mod Podge and a class set of empty marker bottles.
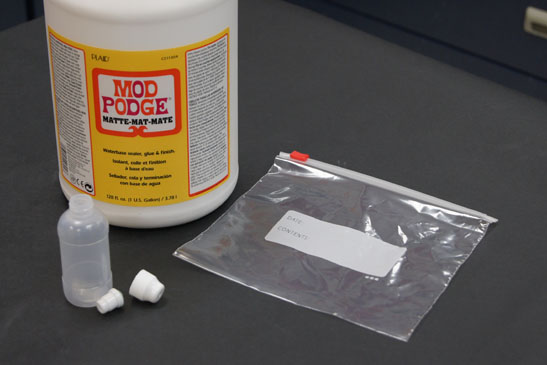
Gather the supplies: Mod Podge, empty marker bottle and a plastic zippered bag.
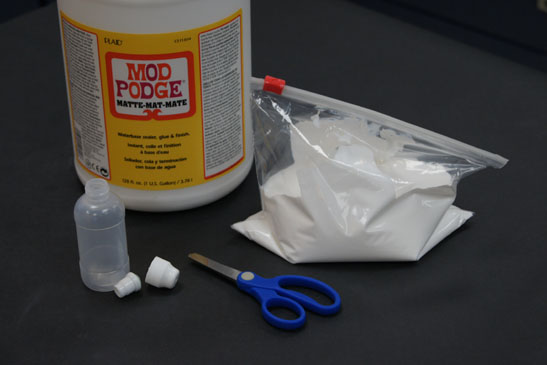
Open the plastic zippered bag and fill it with Mod Podge. Zip the plastic bag closed. Using scissors, snip a small corner tip of the bag.
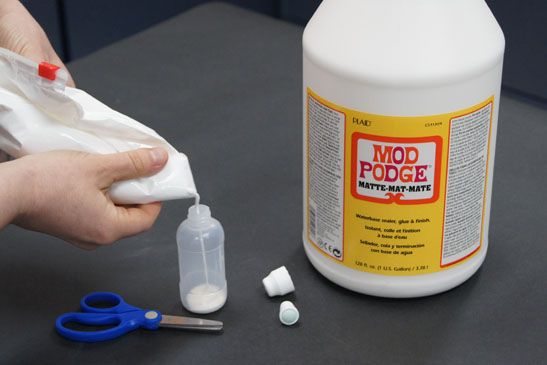
Step 2: Using a bag as a funnel, squeeze Mod Podge into the empty marker bottles. NOTE: It is advisable to fill the marker bottles over a sink.
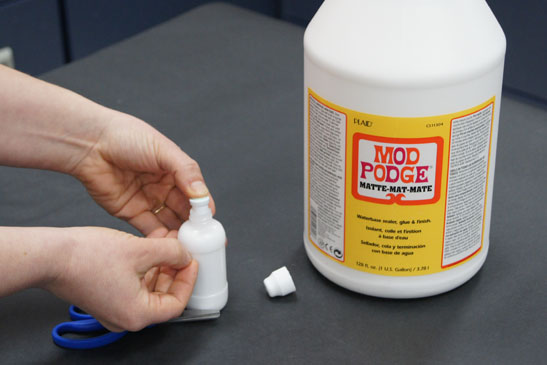
Replace the marker bottle sponge tip and secure the cap to the bottle.
Step 3: Teach students how to use the Mod Podge bottle applicator as a replacement for student glue or glue sticks. Students will learn to push down the sponge-tipped dauber while lightly squeezing the bottle to release Mod Podge. NOTE: Very Important … remind students the importance of screwing the cap back on so the sponge top does not dry out.
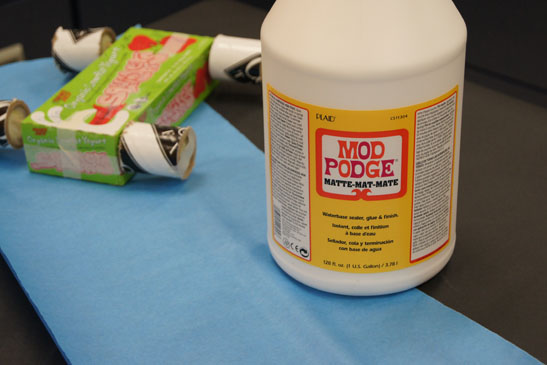
HACK #4: STEAM Projects Made Simple with Mod Podge
Wish your student’s STEAM projects looked more like finished works of art? This hack uses rolled colored craft paper and Mod Podge. Rather than experiencing the mess of traditional papier mache and paint, allow students to papier mache their work using Mod Podge. It will seal, finish and provide color all at the same time!

Step 2: Have students first apply a layer of Mod Podge onto a section to their project.
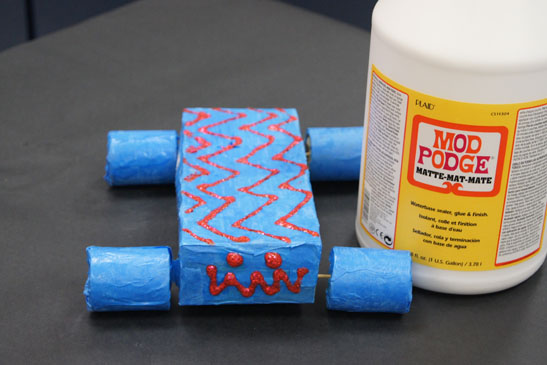
Step 3: Next, have students place small squares of the craft paper directly onto the wet Mod Podge and press in place, then seal applying a topcoat of Mod Podge. Allow to dry. Repeat with a second application of paper for a seamless effect that also adds strength to their project surface. NOTE: It may only take one-to-two layers of paper to create a professional finish.
#5: Mod Podge: No Sink Needed Creating!
Wish your students could create, but you don’t have a sink? Use baby wipes and scrub pads after your students have worked with Mod Podge!
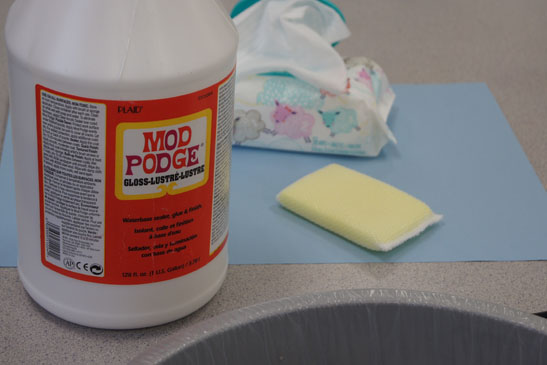
Step 1: Teach students to wipe their hands on a wet, lightly soaped rag (I use baby wipes).
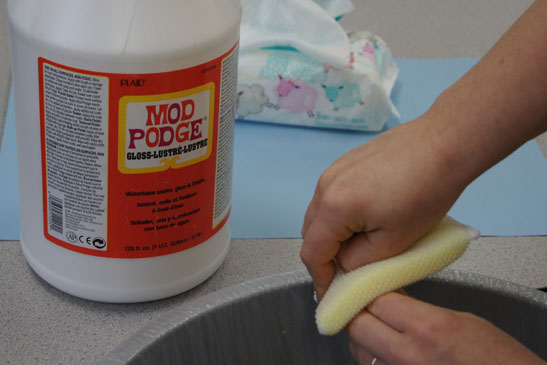
Step 2: Once students finish, repeat step 1 but add in using a scrub pad for any stuck on Mod Podge.
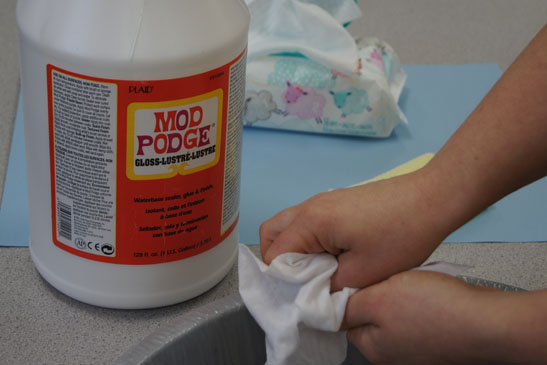
Step 3: Have students finish off with a baby wipe for clean hands without a trip to the sink.
HACK #6: Inexpensive Paper Lamination Alternative
Let’s face it: lamination is a teacher must have, but it can cost a lot in time and money.
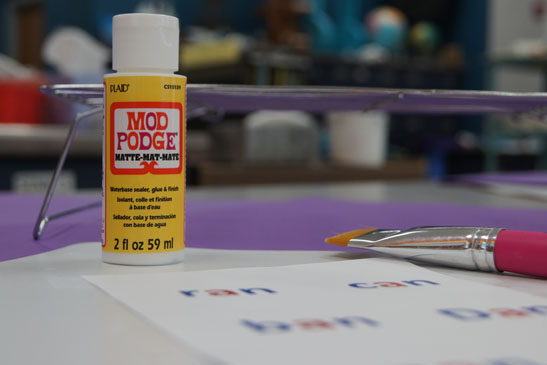
Try using Mod Podge for a lamination-like product that will save you both time and money.
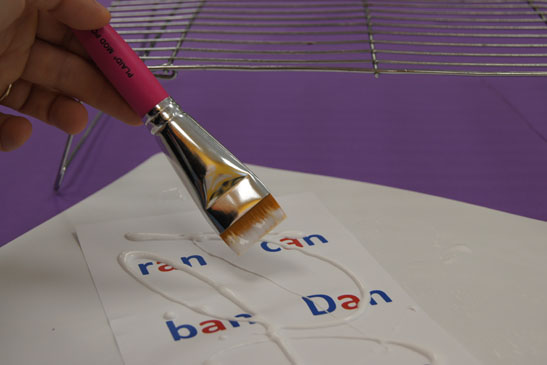
Step 1: Apply Matte Mod Podge for a completely clear and durable seal.
Bonus: Ever have lamination pull apart because the paper was too thick or you had too many layers? Mod Podge can be used to cover as many layers of paper as you want.
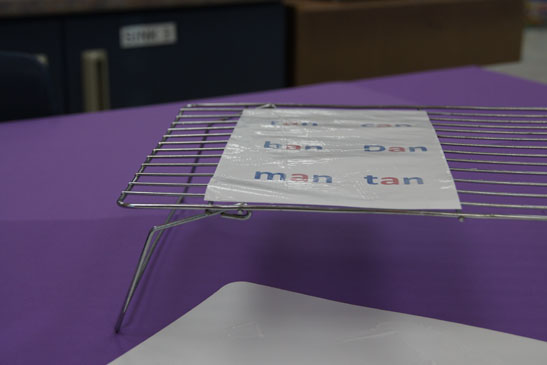
Step 2: Allow 15-30 minutes dry time. I like to use baker’s racks, but you could also use parchment or wax paper.
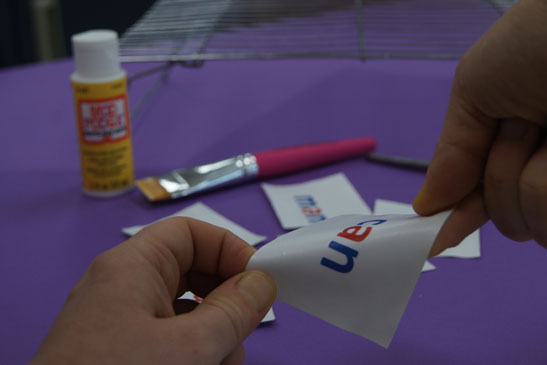
Step 3: Cut apart. For extra strong jobs you can add a second layer of Mod Podge after cutting to seal the seams (this isn’t usually necessary).
The next time you need paper to have that lamination durability try this DIY Lamination using Mod Podge!
HACK #7: How to Tint Mod Podge
Did you know that Mod Podge can be tinted with paint or food coloring? Tinting Mod Podge with paint is easy and gives you unlimited color options! Simply add a few drops of paint to your Mod Podge, stir and apply to your project.
Have you tried any of these tips? Let us know your favorite or how you use Mod Podge in the classroom in the comments!
Don't miss our kits at 40% off thru 3/31/17 - SHOP NOW