Have you ever wanted to create your own stencils, but felt you cannot be trusted behind the sharp blade of a craft knife? ... Or it simply just makes you nervous? ... well, here is the answer to your stencil creativity ... Plaid's 2 - n - 1 Craft Tool! Because this tool actually heats up, you are burning the stencil material rather than cutting through it with a sharp knife!
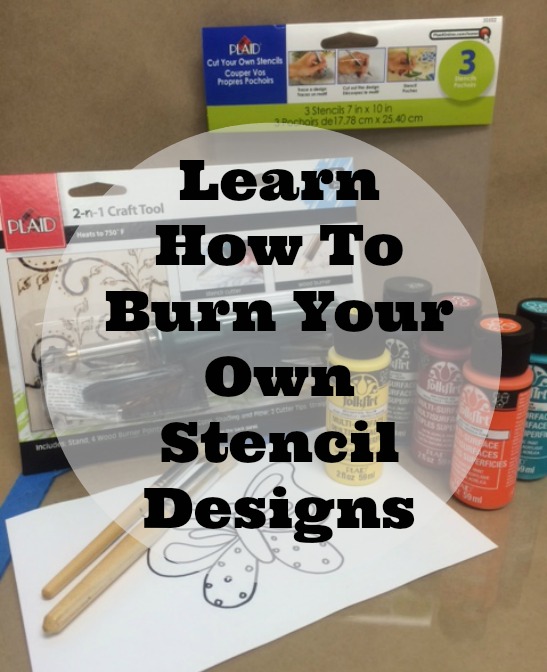
Today, I would like to demonstrate how to use the 2 - n 1 Craft Tool to cut or burn a stencil and then create a quick notecard. First I'll gather a few supplies.....
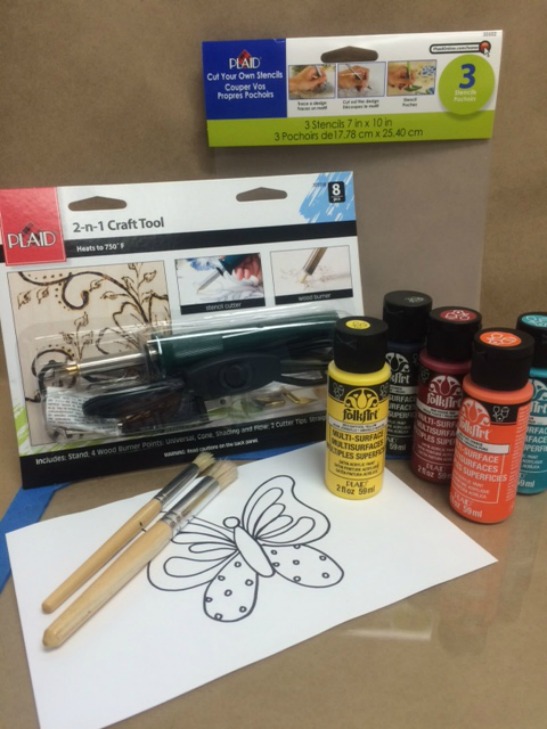
- Plaid's 2 - n - 1 Craft Tool
- Plaid Cut Your Own Stencils Pack (3 stencil blanks)
- FolkArt Multi-Surface Acrylic Paints - Daffodil Yellow, Pure Orange, Engine Red and Licorice
- Stencil Brushes - one for each color
- Stencil Tape
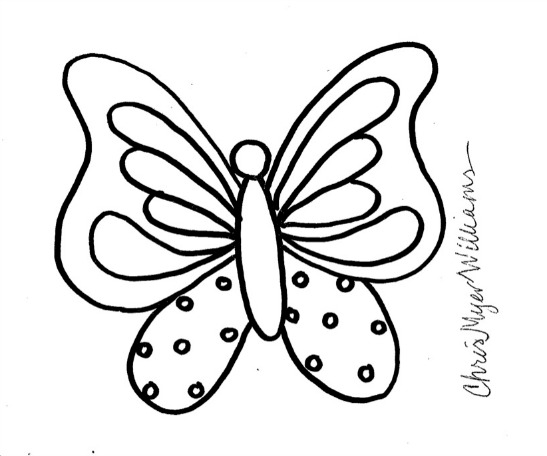
- Miscellaneous Supplies: Line art (my butterfly pattern is shown below and can be resized to fit your project surface), Pane of glass w taped edges, Cardstock note card and envelope, White cardstock. 3D Adhesive dot, Double sided tape, No. 1 Liner Brush, Scissors
Before we begin the lesson today, let me share with you a few fun facts about Plaid's 2 - n - 1 Craft Tool because it is a very convenient tool that no craft room should ever be without!
Because this tool heats up to 750 degrees F, it is perfect for all your wood burning projects!
The same heat will burn or melt through stencil mylar like butter, making stencil cutting a breeze!
Five points in a variety of shapes are packaged with the tool, three designed for wood burning and two for stencil cutting.
This tool is lightweight and easy to manipulate in any direction.
A convenient on/off switch on the cord plus a handy metal easel/stand keeps safety number one when in use.
.jpg)
Here is a picture of the tool, the cord with the on/off switch and the handy metal easel/stand.
.jpg)
Below you can see the five tips or points that come packaged with the 2 - n - 1 Craft Tool. The three points on the left are used for wood burning and the two points on the right can be used when cutting stencils. Wood burning is a relaxing art form; to learn more about how to get started wood burning, check out this blog post!
There really is not a terrible amount of difference between the two stencil cutting points, both will melt stencil mylar easily. In my personal opinion, the difference is mainly how the burner is held. Notice one point has a straight tip and the other is curved.
.jpg)
The metal easel or stand is convenient and the perfect spot to rest your heated tool when not is use. TIP: I always tape my easel/stand to my work surface so that it will stay stationery to prevent accidental burns.
.jpg)
And here is the tool resting in the easel/stand taped in place!
.jpg)
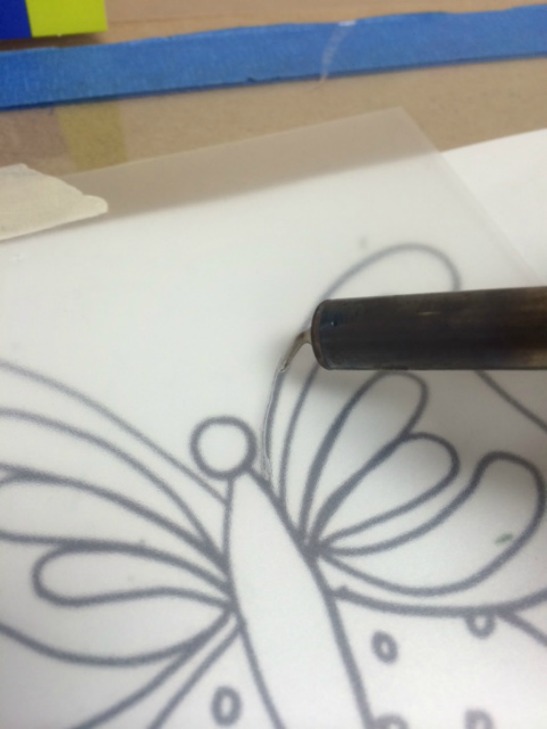
Ok, so let's get down to business. When cutting a mylar stencil blank always cut against a pane of glass which will protect your work surface from burns. TIP: Be sure to tape the edges of the glass preventing accidental cuts.
There are two different ways to prepare your line art and mylar to be cut. Either technique works well; it becomes personal preference or choice as to what works best.
1. Position your line art directly on the work surface. Lay the sheet of mylar over your line art and retrace the pattern with a permanent marker creating lines for the various areas to be cut.
OR
2. Position your line art directly under the pane of glass. Lay the sheet of mylar over the glass making sure your line art is visible and tape in place using a piece of stencil tape.
For this demonstration, I am using technique no. 2 with the curved point.
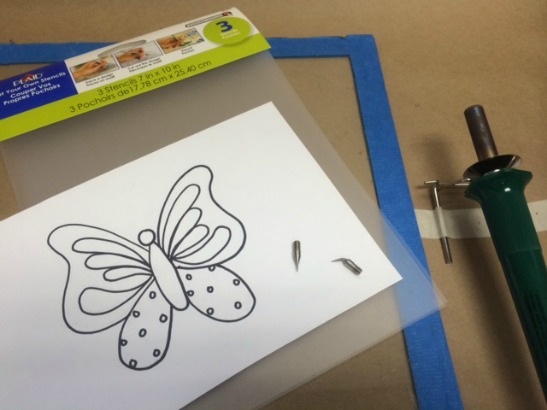
So I screwed in the curved point on my 2 - n - 1 Craft Tool, plugged it in, set it on the easel/stand and turned the switch on allowing it to heat up.
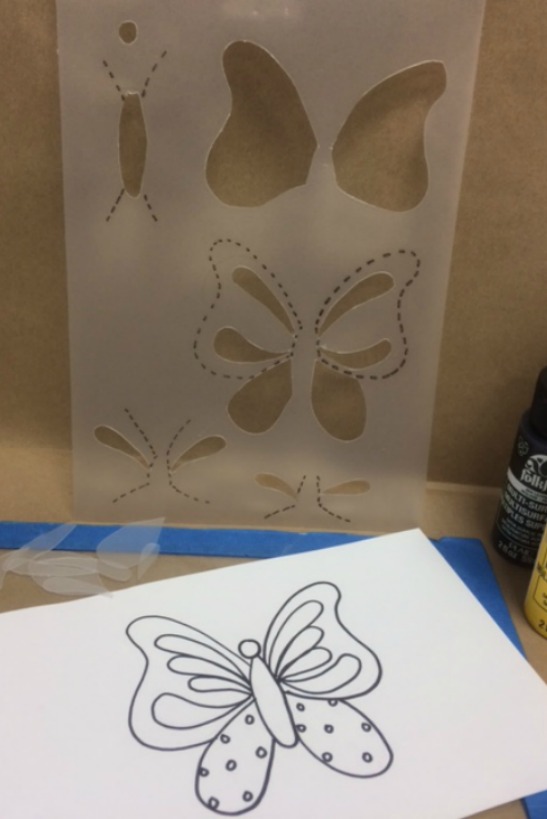
I also positioned my line art underneath the pane of glass and taped my stencil material to the glass over the artwork. For this demonstration, I quickly drew a simple butterfly, however, you can create delicately detailed stencil designs too.
Once the 2 - n - 1 Craft Tool was heated and ready to go, I placed the point directly on the mylar over a pattern line and then gently guided the tool with a steady movement. You will notice immediately how easily the mylar will melt. Continue directing the tip along the pattern line to cut or burn one section at a time.
Lift the mylar from the glass, reposition to a clear spot and cut the next stencil overlay or section. You can see below, I first cut the wing shape and then began cutting the detail strokes which will be layered over the wing. TIP: It is always a good idea to use a fine point permanent ink marker to mark directly on the mylar a few dotted lines or registration marks which will help you align each layer of the stencil design.
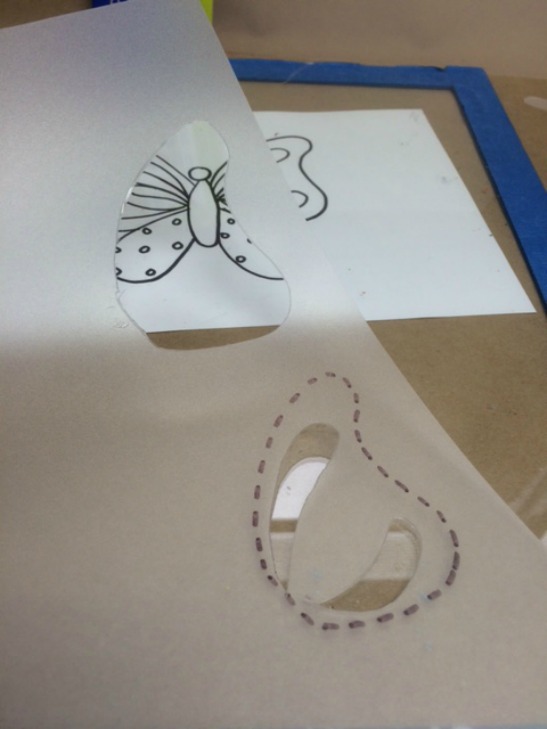
The picture below will show you how I cut my stencil with the variety of layers or overlays and how I applied my registration marks to the sheet of mylar. TIP: Because the 2 - n - 1 Craft Tool will burn through the mylar like melting butter, it is so easy to manipulate the tip in any direction as opposed to cutting a stencil using a craft knife where you MUST always pull in one direction towards you.
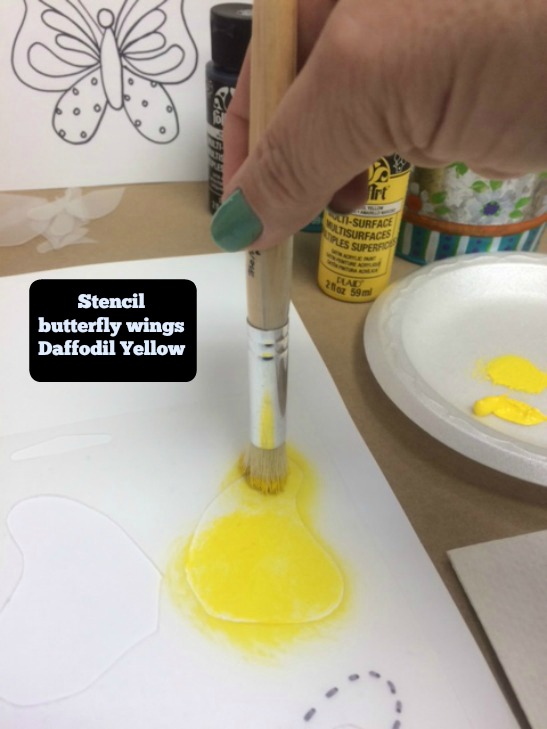
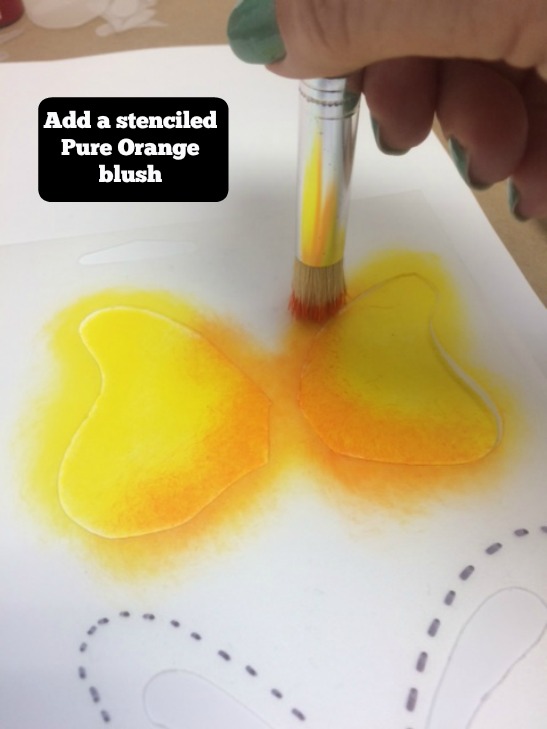
So now, let's test my cutting ability .... and stencil the butterfly. I positioned the stencil over a sheet of white cardstock and stenciled the base shape of the wings Daffodil Yellow.
I then added a shaded blush of Pure Orange closest to the body. Lift the stencil, then position the next layer.
These areas were stenciled Pure Orange and blushed with Engine Red.
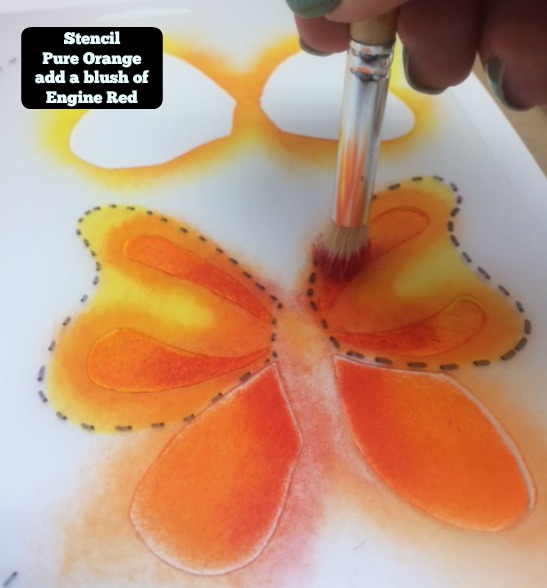
Continue matching up the registration lines to what was previously stenciled and complete the stenciled butterfly by adding a couple more wing embellishments and a Licorice body and head.
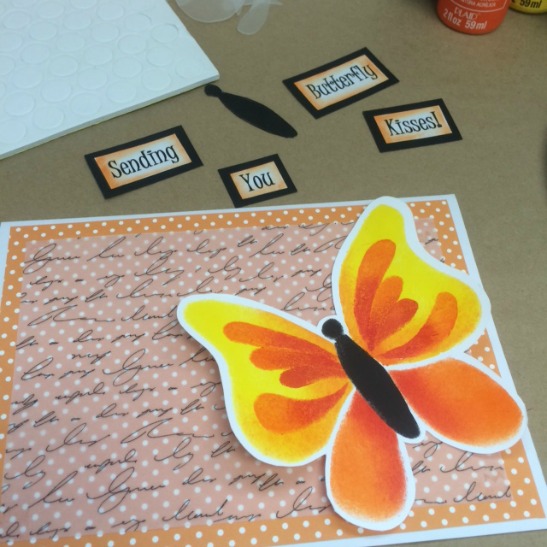
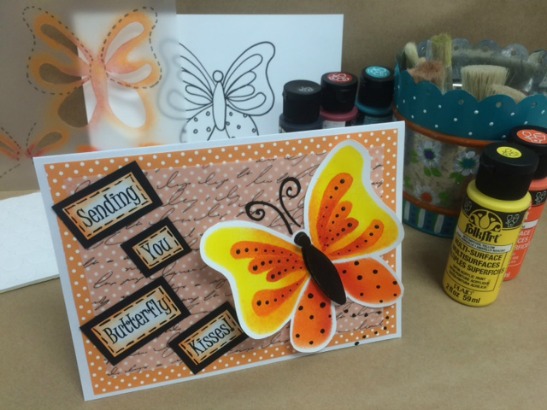
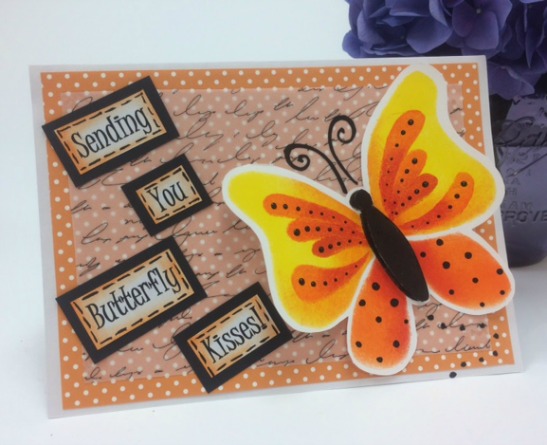
Next, I gathered some card making supplies: a few scrapbook papers cut smaller than the front of the note card, a computer print out "Sending You Butterfly Kisses!", and a little double sided tape.
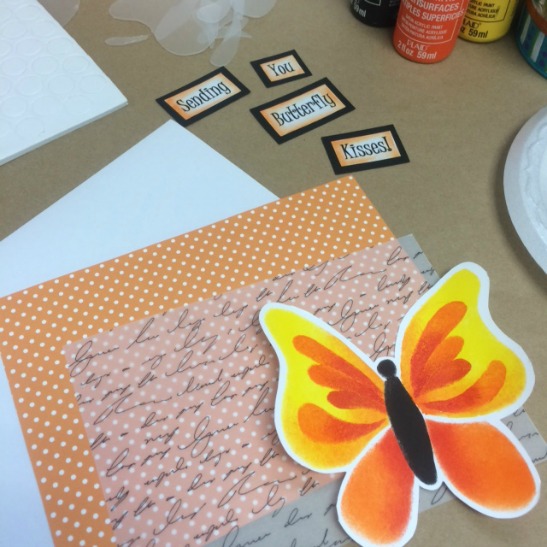
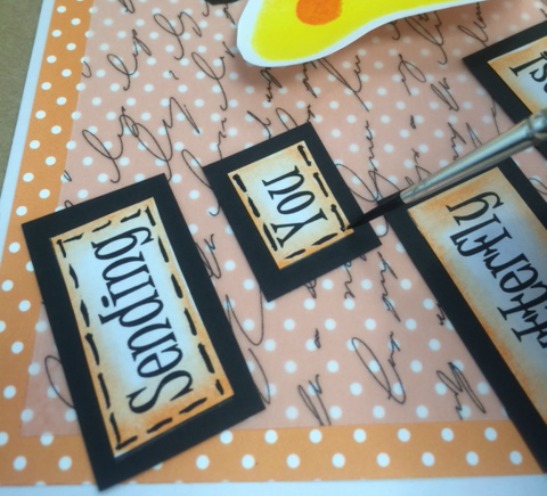
Using a dry stencil brush loaded with Pure Orange, brush around each word to add a blush of color; then cut out each word allowing for the Pure Orange halo. Layer and adhere the color tinted words over black cardstock using double sided tape; then cut the black cardstock allowing for a small halo of black to frame the words.
Using a pair of scissors, I cut around my stenciled butterfly allowing for a narrow halo edge as a highlight.
Next, I layered one sheet of scrapbook paper (orange polka dots) to the note card and a second sheet (transparent script writing) over the polka dots.
You can also see in the photo below that I stenciled a second butterfly body and head, then cut it out.
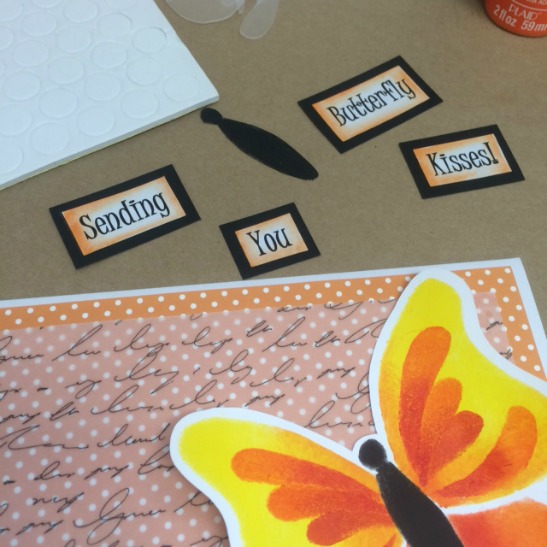
Continuing to "build" the note card, I added a little double stick tape to the backside of the butterfly body and attached it to my note card placing the butterfly on an angle. You can see that the wings are not attached.
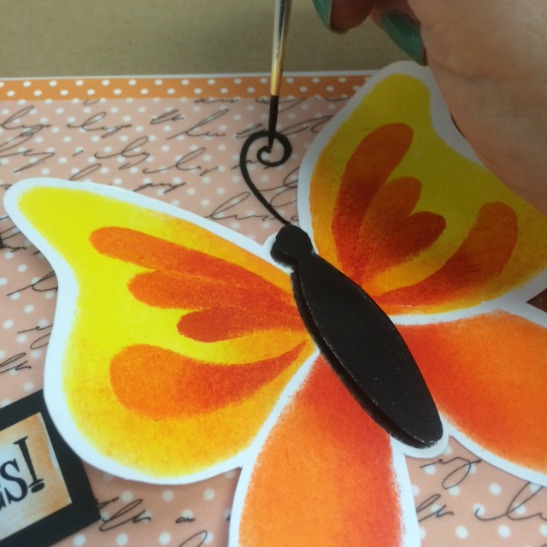
Next, I added the second butterfly body and head dimensionally using a 3D glue dot.
The message, "Sending You Butterfly Kisses!" was added next.
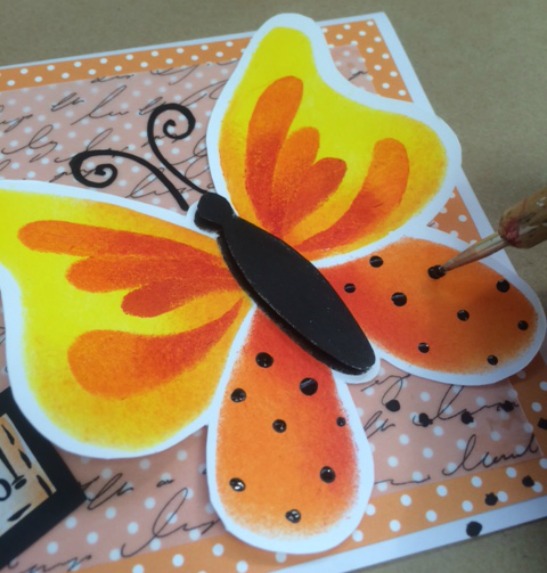
Of course, my butterfly needed antennae so I loaded my liner brush with thinned Licorice and painted a flowing, curvy antennae.
Still working with my liner brush loaded with thinned Licorice, I painted dash lines around each of the words....
... and added polka dots with my stylus for extra embellishments! TIP: If you do not feel comfortable working with a liner brush, please use a permanent fine tip black marker! It works great too!
And here is a look at my completed notecard created with the use of my very OWN simple butterfly stencil.
Creating stencils with Plaid's 2 - n - 1 Craft Tool is convenient, easy and fun! Why not give it a try today?
Butterfly Pattern