Here on The Plaid Palette, every Tuesday has turned into a "How-to" inspiration article. While I was thinking about what I could blog about this week, I thought of all the common sense to crazy things I know about the art of decoupage. An article written sharing some of my tips and techniques might be fun. Don't you think?
Decoupage as an art form has been around for many years. The word decoupage is from the French word, "decouper" which means to cut out. Paper is cut in various shapes and then applied to a surface which is then lacquered multiple layers with a slow-drying solvent-based lacquer. Next, the tedious task of wet sanding between coats always ensured a silk-like smooth finish.
Today in the fast paced world that we live in, we craft on the fly and want to accomplish our craft projects quicker. That is why Mod Podge is an answer product to today's crafter wanting to decoupage! Mod Podge acquired its name from the terms "Modern Decoupage" where you do NOT have to wait hours for a solvent-based lacquer to dry before applying yet another coat. Mod Podge is a glue, sealer and finish all in one!
So ... let's talk basic Mod Podge technique tips ...
1. What basic decoupage tools should a beginner have on hand?
I believe the most important crafting tools to have ready when decoupaging are: sharp scissors, a craft knife with a sharp blade, self-sealing craft mat, a good 3/4" flat brush or a larger one if working on furniture, fine grit sandpaper, a decoupage brayer and/or a squeegee, a ruler, an emery board and waxed paper.

2. Are you a beginner when it comes to decoupage and not sure what is the best project surface?
No worries ... decoupage can be created on most surfaces such as wood, tin/metal, paper mache, terra cotta, plastic, Styrofoam, glass, ceramics and canvas to name a few. Keep in mind some surfaces may be considered "decorative only" and may not withstand machine washing.
3. How should I prepare my project surface before I begin to decoupage?
Take the time to properly prepare your surface before decoupaging your paper print or fabric in place. You will be happier with your finished project if you have taken the time to either prewash, sand smooth, prime or basecoat your craft surface first.
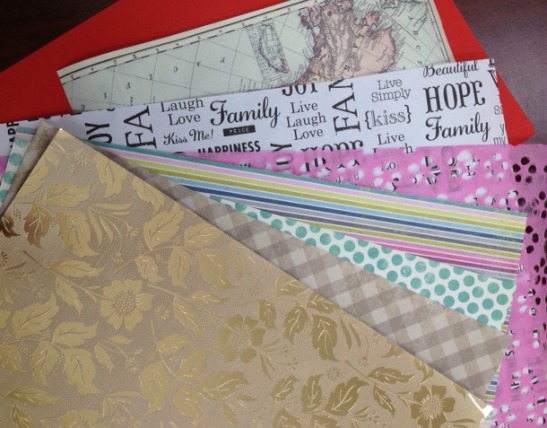
4. What types of papers can be used in the art of decoupage?
Literally any type of paper can be decoupaged from simple to delicate. Try all sorts of papers on a variety of projects, such as: scrapbook papers, gift wrap, cardstock, tissue paper, napkins, maps, notecards, ticket stubs, rice papers, metallic foil papers, gum and candy wrappers and magazine cutouts just to name a few. Use your imagination. And don't forget ... fabric can be decoupaged as well! Try decoupaging fabric of all sorts from tightly woven blends to open weave lace and burlap.
5. What is the best way to trim my paper prints?
Of course there are all sorts of paper trimmers, punches, craft knives and scissors on the market today and all can be used a various times. However, when cutting intricate or detailed areas, try trimming your paper using scissors with a sharp yet short blade. Remember always to trim close to the printed color so that all background paper is removed preventing a "halo" of background color around the image being cut. Did you know that when cutting, it is best to turn the paper you are cutting rather than turn the hand that holds the scissors? You will have more control and achieve a smoother cut.
6. What is the best way to apply Mod Podge?
When decoupaging, it is best to apply Mod Podge to both the project surface as well as the backside of the item to be decoupaged. For best adhesion, apply "glue to glue" when decoupaging. And here is a helpful hint when working with thick or sturdy papers ... try wetting the paper slightly with clean water (mist it with a water bottle or quickly dip it into a bowl of clean water). The moisture will help the paper become more flexible and pliable.
7. Did you know it was important to apply pressure to the paper or fabric being decoupaged after it is applied to the project surface?
It is important to apply pressure while smoothing the paper from the center outwards because you want to make sure: 1) you have good contact on all sections of the image being decoupaged, 2) you squeeze out excess decoupage medium, 3) you are able to release any caught air bubbles, and 4) you remove any wrinkles in the paper.
8. How do I recommend decoupaging or as we call it today Mod Podging?
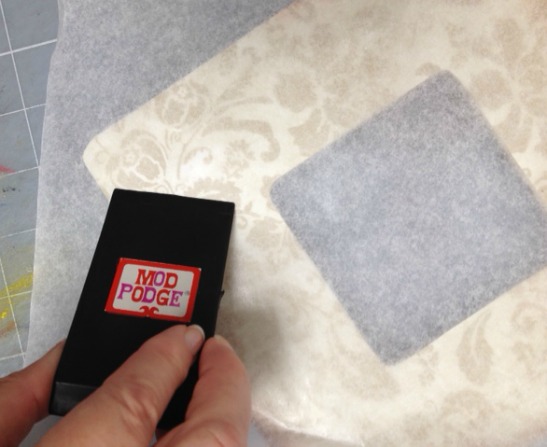
I find it helpful to follow all the recommendations listed above. I also learned a trick a while back that if after applying the paper to the craft project surface, lay a sheet of waxed paper over then smooth out using a Mod Podge Squeegee or Mod Podge Brayer. Adding a layer of waxed paper between the print and your tool will protect the tool and keep it clean. Any excess Mod Podge squeezed out will be on the underneath side of the waxed paper rather than on your tool.
Here's a pic of the Mod Podge Brayer in action .....

and the Mod Podge Squeegee. Each tool is kept clean of any excess Mod Podge with the protective layer of wax paper.
9. What is the preferred amount of decoupage medium top coats?
The answer to this question is based on your personal preference. I suggest two to three coats allowing amply drying time between applications. Once completely dry, you can finish your decoupaged project with a light misting of clear acrylic sealer to seal and protect.
10. What is my favorite formula of Mod Podge?
Now that truly is a trick question because I LOVE them all at various times of the year. At Christmastime, I LOVE Sparkle Mod Podge and Extreme Glitter Mod Podge as both provide that extra layer of glam and glitz to my holiday projects. Glow-in-the-Dark Mod Podge is PERFECT for all my Halloween crafting. And I enjoy the look and feel of all things vintage, so Antique Matte Mod Podge fits that need. Paper Mod Podge in both Matte or Gloss is perfect when card making, Outdoor Mod Podge is great for summertime birdhouses and outdoor projects and Fabric Mod Podge is best for fabric-to-fabric projects. When crafting with the kids, Wash-Out for Kids Mod Podge is ABSOLUTELY the one to have on hand as it will not stain their clothes and it DOES wash out! I used Hard Coat Mod Podge on frequently used projects that I want an extra durable finish on. I really am enjoying the new Mod Podge Furniture formulas: Furniture Matte, Furniture Satin, and Furniture Gloss. It's the best way to upcycle a thrift store furniture find! And the new Dishwasher Safe Mod Podge is a new twist for glass decoupage projects which is top shelf dishwasher safe! Let's not forget the originals ... Mod Podge Matte, Mod Podge Gloss and Mod Podge Satin ... they are an everyday staple in my crafting studio!
I hope that you enjoyed this blog post and learned a bit more about Mod Podging and the art of decoupage! Helpful Hints and Technique Tips are always fun to know! Try a project today, I promise you will lose yourself in the joys of crafting and creating!